Stringing is the bane of every new 3d printer user. The good news is… it’s an easy problem to solve. We’ll go over some solutions below.
So, you’ve decided to invest in a 3d printer.
You got yourself a Prusa i3 Mk3s+, one of the best printers on the market. You assemble your printer and set it up. Printing time!
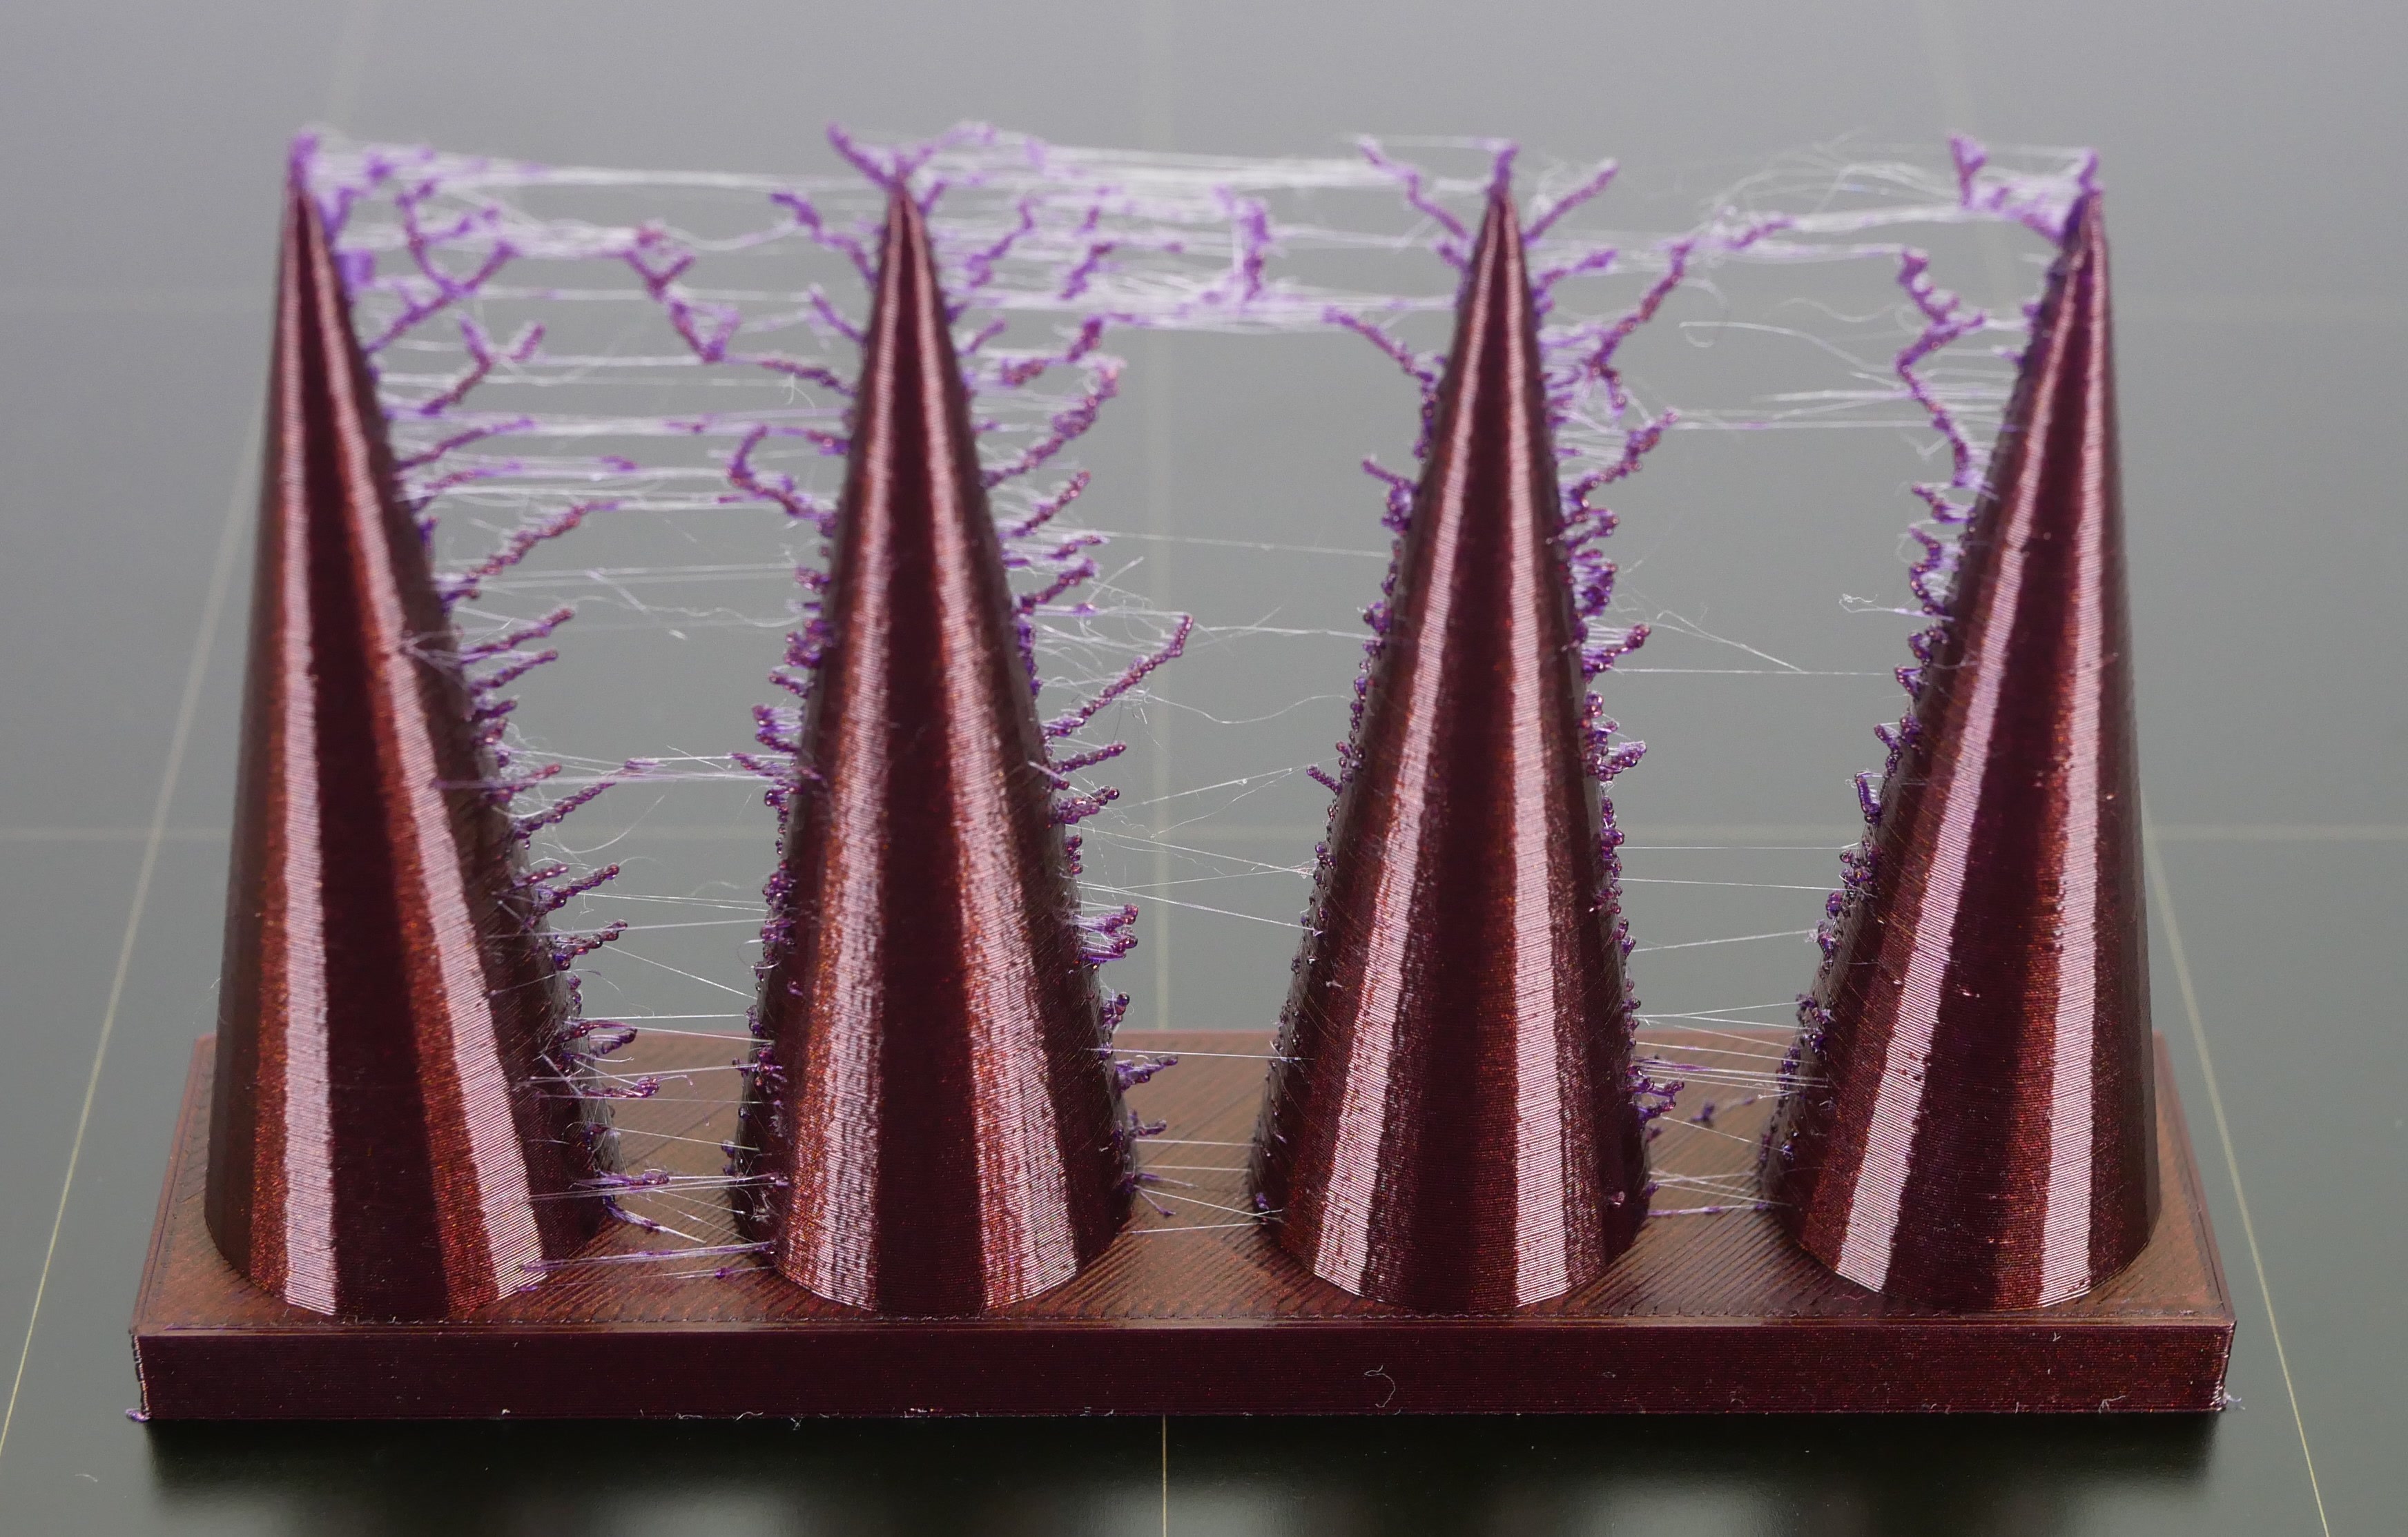
The first few prints turn out well. But what’s this? Thin spider webs and tentacle-like strands of filament surround your print. You’ve become a victim of printer stringing.
Let’s go over what stringing is and why your Prusa Mk3S is tringing. We’ll also go over some easy ways of ensuring it never happens again.
What Is Stringing?
Stringing is what happens when your printer extrudes melted plastic unnecessarily. This string gets dragged to the next print layer and sticks to it.
This causes strings of filament to stick out of your print. It commonly happens when you haven’t fully calibrated your slicing software.
If you have a bunch of stringing on a print you can fix it by cutting the strings with a nipper or hobby knife. You can also sand it down.
Of course, better is if it doesn’t string in the first place. Plus, stringing can make some prints unsalvagable if not managed and contained.
Why Does Stringing Happen?
Molten filament causes stringing.
It happens when your nozzle travels some distance without printing. Without the proper retraction settings, the hot nozzle will continue to leak filament, which turns into strings.
This is more common with Bowden extruders (not your Prusa) but can happen on Prusa’s, too.
With too much pressure in your hotend, filament leaks out of the nozzle rather than getting sucked up the extruder.
This leaves ugly strings sticking out of your print and may ruin its integrity. When left unattended, you may need to scrap your whole print because of stringing.
Factors That Cause Stringing
Stringing is a printer error that can happen to the most seasoned printer user. Here are the main reasons why stringing occurs.
1. Retraction Settings
Retraction is how far and how fast your extruders pull back the filament. It is also how long it takes for your printer to retract your filament up the extruder.
Retraction is the most important factor in eliminating stringing.
2. Temperature
Having a nozzle that is too hot for the filament means that more filament melts and leaks out. This excess filament is dragged to the next layer and glued into place.
Keeping your nozzle at temperatures that are too high results in stringing.
3. Print Speed
Printing slowly ensures smoother print lines.
But it can also allow time for the leaky filament to solidify. This solid string gets dragged to the next layer, ending as a string.
4. Nozzle
A dirty nozzle is more likely to form clumps of melted filament right outside it. This causes stringing and oozing when it feeds filament again.
A dirty nozzle will also develop blockages if you aren’t careful.
8 Steps for Fixing Stringing on Your Prusa i3 Mk3s:
You can solve stringing by adjusting your retraction settings.
It entails adjusting your temperature and print settings. It also involves keeping your nozzle and filament clean.
Here are a few surefire ways of getting rid of stringing and making sure it never bothers you, or your prints, again.
They work on filament types, such as TPU, PLA, ABS, and PETG.
1. Adjust Your Temperature Settings
Incorrect nozzle temperature is the #1 reason for stringing prints on the MK3S+.
Manufacturers have recommended temperature settings for a reason. I like to stick to the mid to low recommended temperatures unless I’m printing for speed.
The ideal nozzle temperature for the i3 Mk3s is usually between 190-230 degrees celsius.
If you’re below recommended settings you’ll likely be unable to fully melt filament, leading to clicking/skipping extruders and/or under-extrusion.
Anything above that can also cause stringing, curling and blobs. Adjust the settings in your slicing software or manually feel around with the printer’s selector knob.
Finding the right temperature will allow your material to cool. It will also prevent strings from leaking during travel.
2. Clean and Clear Your Nozzle
Prevent build-up by cleaning your nozzle. The Mk3s+ comes with an acupuncture needle you can poke into your nozzle to help clear any blockages.
You can also use a hard brush on the nozzle’s exterior to prevent the melted filament from building up. Keeping the pathway clear makes it easier to retract your filament.
Related: How to Unclog a 3D Printer Nozzle
3. Increase Travel Speeds
If you’re printing many prints at once or items with a large dead space your nozzle will need to travel outside of the print’s parameters.
This dead time gives your nozzle enough time to leak strings. Don’t let that happen!
You can adjust your travel settings in PrusaSlicer/Cura. The faster your extruder travels, the less time it has to develop strings.
It also increases your overall printing speed (slightly).
4. Ensure Filament Stays Dry
Keeping your filament in a cool, dry environment makes it more reliable. The more reliable it is, the less likely it will behave differently. This is a small but important way of reducing stringing.
You can store your filament in plastic containers away from moisture and heat. This way, it doesn’t develop oils or a high internal temperature.
These will prevent it from becoming strings and give you the best possible prints.
You can also purchase a filament dryer. Here’s the one I bought (and love!) and another that looks really good but didn’t exist when I purchased mine:
5. Reduce Distances Between Prints
Closing the distance can be done manually in your slicing software. When arranging your print bed in PrusaSlicer, set your items closer together.
Setting them closer reduces travel distance. This reduces the chances of stringing. Reducing the distance will also save you printing time.
If you’re looking to ensure every layer prints properly, you might have to turn off stealth mode on your i3 Mk3s. You can only recover lost layers in Prusa’s normal mode.
6. Enable and Tune Your Retraction Settings
By default, PrusaSlicer’s retraction settings are on and are well-set. But sometimes they can get turned off/messed up and need to be restored.
Prusa recommends no more than 2mm of retraction (default is 0.8mm) and a retraction speed of 35mm/s.
Be sure you have “Wipe while retracting” enabled.
Another useful setting is to activate the “avoid crossing perimeters” setting. Should your printer still extrude, it will avoid dragging it to the outside of your print.
If you’re printing with flexible filaments (such as TPU), Prusa says you can go over the 2mm retraction distance limit due to extra stretching of the flexible filament. You also should plan on printing quite a few stringing tests.
I also find that Wood PLA needs a lot of tweaking/tuning outside of the recommended settings.
7. Larger Retraction Distance
It is also best to increase your retraction distance… but not by much (we’re talking tenths of a millimeter at a time).
By increasing retraction distance you’ll relieve more pressure from the meltzone, causing less unwanted oozing. This ensures that no filament can turn into strings while traveling across the print bed.
But beware, you want the smallest possible retraction distance while still eliminating stringing.
Also note that Prusa DOES NOT RECOMMEND going above 2mm of retraction on the direct-drive MK3S+ unless you’re printing with flexible filament.
Too large of a retraction distance will cause the extruder to chew through your filament and can cause blockages, skipped steps, or make the extruder unable to push any filament through.
8. Faster Retraction Speed
This move is also related. By increasing your retraction speed, you can ensure your printer sucks up the filament as quickly as possible, relieving excess pressure.
Can’t have stringing if there’s no material to melt!
We want the material to only touch the nozzle when you’re ready to print. It should stay in the extruder until it’s ready for the next printing layer.
Other Common Printing Issues
Stringing and oozing may be solvable, but there are still a handful of issues you’ll need to solve.
Here’s a quick rundown of other feeding issues and how to address them.
1. Blobs and Zits
Print acne is any small bump of excess filament that appears on your print. The same factors that cause stringing cause blobs to form. The same solutions also apply.
It’s best to adjust your extrusion and retraction settings. You should lower your print speeds and temperature. You can adjust these settings in your slicing program.
Blobs aren’t as inconvenient as stringing. You can usually clip it or sand it with sandpaper after printing if needed.
2. Overheating
Overheating becomes plain to see when your printed item melts. You must find a balance where your filament comes out soft and hot but hardens as it cools.
You can increase the speed of your extruder fan and decrease your nozzle temperature. These steps give your material enough time to cool before the next layer coils around.
3. Overextrusion
This is an ugly problem that can ruin the best prints. Stringing, blobs, and overheated filament are all symptoms of over-extrusion. It is a result of overheating.
The excess material that gets extruded destroys the external appearance of your print. You can solve this by updating your settings on PrusaSlicer.
4. Curling + Rough Corners
Curling is another misprint caused by overheating. The print layers change shape as they cool, causing ugly deformations and excesses.
You can solve curling by adjusting your extruder temperature. Keep it on the lighter end. You can also keep your nozzle clear and adjust extrusion settings.
In general, these problems can all be solved on PrusaSlicer. Go through your advanced settings and calibrate. Don’t be afraid to experiment by printing small test prints.
In summary
Stringing and oozing are serious problems for any MK3S user. Fortunately, you can solve them.
Fix your settings. Keep your nozzle clean. Find the right temperature. Problem solved!
Take care of your machine, and it’ll take care of you and your prints.
You can save on time, effort, and filament by taking steps to prevent stringing.