Your guide to achieving 25 times faster print speeds (1000 mm/s!) from an Ender 3
Let’s see, where to start?
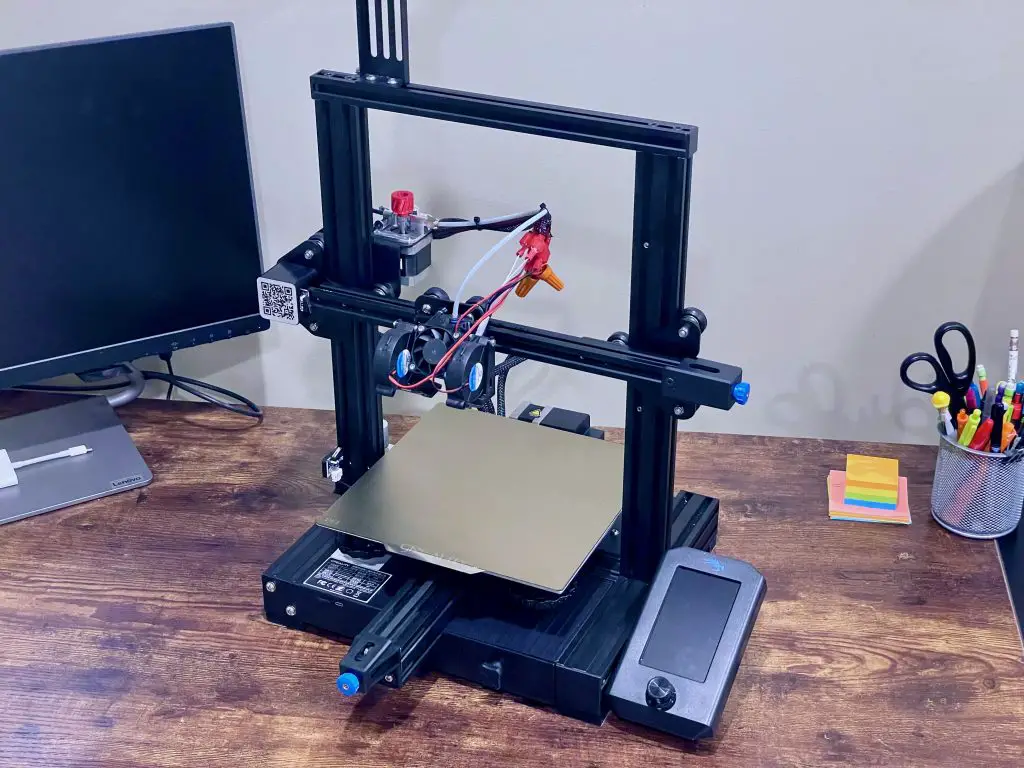
I used to have a stock, slow, boring Ender 3 V2 and now I can technically print a Benchy in under 4 minutes.
Your silly stock Creality Ender 3 V2 printer maxes out at ~100mm/s – or a flow rate of 9 mm^3/s printing at a 0.2mm height and 0.45mm extrusion width.
But if you follow along, you’ll be able to push over 52 mm^3/s (aka 579mm/s at 0.2mm height & 0.45mm width… or 1,303 mm/s at 0.1mm height & 0.45mm width).
I’ll do the math for you, that’s 5.7 times more plastic pumping out of my printer in the same amount of time.
52mm^3/s is technically fast enough to print a benchy in under 4 minutes.
Of course, at those speeds flow rate is no longer what limits your print speed.
But we’ll get to that.
(And yes, here’s proof that a Benchy can be printed in sub-4 minutes, first accomplished by 3DPrintFun.)
So, how do we build a printer that can print at 1000 mm/s without breaking?
There are four main things you need to do to 3D print at crazy fast speeds.
- Boost your volumetric flow rate to at least 45mm^3 per second
- Overhaul your part-cooling system
- Get your bed to move fast enough by boosting your stepper motor torque, cutting weight, and reducing friction
- Upgrade to Klipper firmware (then tune, tune, tune it).
- Improve print quality (reduce ringing, reinforce the printer, cut more weight, upgrade to direct drive, etc)
Depending on if you get a deal on your starting printer, you should be able to do all of this and buy the printer for under $600.
Let’s start at the first bottleneck to print speed and look at a low-cost way of boosting speeds by 33% – even if you ignore everything else.
how to Increase print speed – boost your volumetric flow rate
The volumetric flow rate is the total plastic you can push through your hotend.
And your hotend setup and extruder are the first major bottlenecks caused by most 3D printers, especially Creality Ender 3’s and Ender 3 clones.
Namely:
- The extruder gears suck and can’t push filament with enough force and
- The hotend is usually “meh” powered at a pitiful 40 watts.
Here’s what you need to do to boost your flow rate:
- Get a (much) better hotend
- Upgrade to a high-end extruder assembly
- Boost everything by 30% with a Bondtech CHT nozzle.
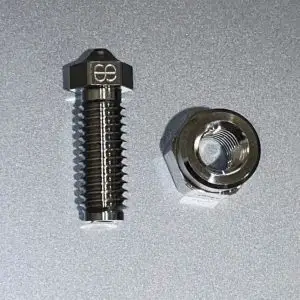
Increase print speed on any 3D printer by 30% in 10 minutes for $20.
Right now, go buy a 0.6mm CHT nozzle. It’s the best $20 you’ll spend.
No, you can’t get them on Amazon.
The CHT nozzle uses a patented (and super cool) design that splits your filament into three smaller pieces.
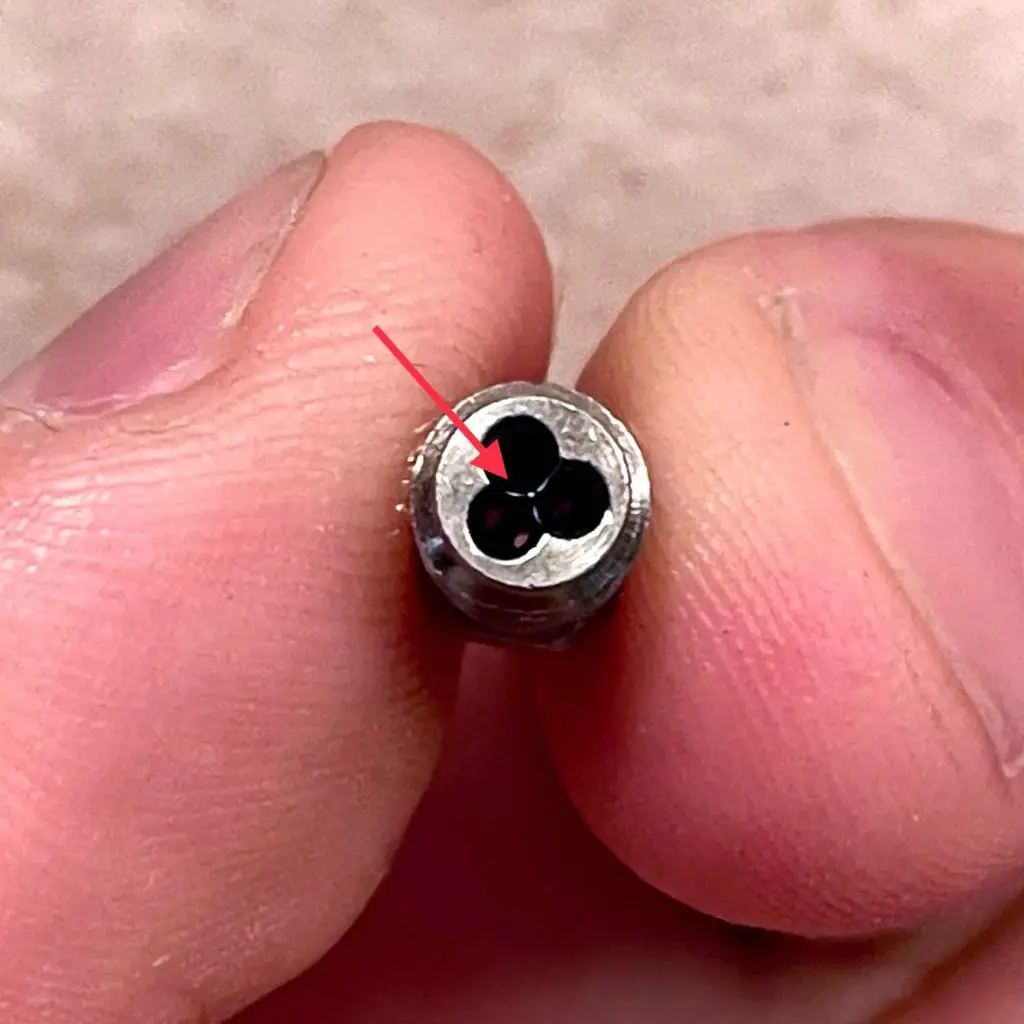
By splitting filament into smaller pieces there is more surface area touching your heating element. That means you can heat the center of the filament easier, allowing you to push 30% more filament.
For a friggin’ $20 and the time it takes to change a nozzle.
It’s literally the cheapest, easiest upgrade to boost your max printer speed.
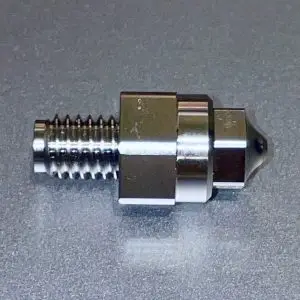
I could keep going but you should just go get one at Slice Engineering if you plan on upgrading your hotend to a V6 style mount like the ones I recommend below (you should).
If you’re sticking with a stock Creality “MK8” hotend you can get a CHT for it direct from Bondtec.
The CHT is offered in both but they’re not interchangeable.
Next, you’ll need to upgrade your hotend.
My choice was the Phaetus Rapido (Phateus Rapido Review).

- New heating block design: the heating block has a larger melting zone to meet the demands of high-speed and high-temperature printing.
- Uniform heating: the cylindrical ceramic heating unit ensures more even heating.
- One-handed nozzle change.: a unique design allows for quick switching between high-flow and ultra-high-flow printheads, with different types of nozzles available for high temperature and fiber...
- Thin-walled heat break: the thin-walled heat break helps prevent heat creep and clogging while also offering excellent thermal insulation.
It comes in high flow and Ultra High Flow.
What’s the difference?
The high flow comes with a “Volcano” length nozzle and a collar, allowing for a larger melt zone.
Go UHF if you’re not planning on getting the CHT.
If you do get the CHT, it doesn’t matter if you go high flow or ultra high flow – you’ll be swapping out the nozzle anyways.
But what’s so special about the Rapido (especially if you’re changing the nozzle)?
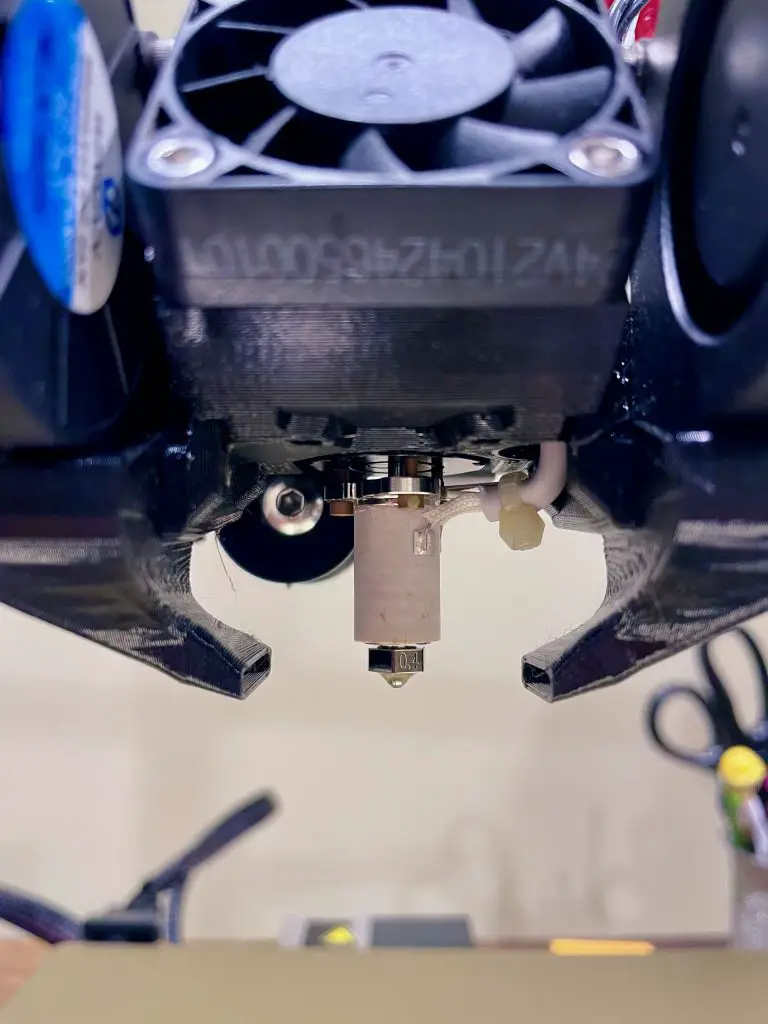
See the white cylinder just above the nozzle?
That’s a 360° wrap-around heater rated at 100 watts – 2.5 times more powerful than your stock printer.
This allows a much more direct heat transfer and heats up in literally 10 seconds from dead cold.
It’s bananas.
Last up, the extruder.
The stock extruder on an Ender 3 series (up until the Ender 3 S1 printers) is trash.
If it’s not cracked, it will be.
Soon.
Also, the teeth on the extruder gears are flat and crap.
After a ton of research and trying to talk myself into the Alibaba drop-shipped “red” all-metal extruders, I just couldn’t do it.
It’s clear that most of the Amazon/Alibaba reviews are fake and the ones that aren’t had major issues within a month or two.
We need speed, and speed demands a tight grip on our filament so the extruder can push hard.
So I went with the Micro Swiss Bowden Dual Gear Extruder. It’s the only thing I really couldn’t compromise on budget.

- Fits: Bowden extruder machines, Fits NEMA 17 size stepper motors
- Fits: Ender 3, 5, 6, CR10, CR-10s Pro, CR-10S, CR6-SE, Tornado
- Made in USA by Microswiss
Now, the right thing would be to buy a direct drive extruder with built-in pancake motor.
And it might be the way I have to go.
But for now, we’re seeing how far we can get on a Bowden setup as it saves considerable mass off of the print head.
Overhaul your cooling system
You’ll need to upgrade three things:
- Your cooling system (I used the HeroMe Gen 6, but it was a total pain to build and would recommend trying the compact Manta system)
- Your part cooling fans (I used WINSINN 5015's)
- Your hotend cooling
You can reuse old wiring but be sure to match new voltages or use a step down buck converter to turn the stock 24v into 12v.
Boost torque, cut weight, and reduce friction
As of now, this is where I am. I’ve included some resources for you to use as I continue researching and testing.
Step 1: Boost torque
Step 2: Cut weight
There are always another few grams you can shave off your weight.
That said, here’s where I’m at (so far).
The Creality Ender 3 V2 comes with a glass bed weighing in at ~510g. The problem is, at high speed that’s a lot of mass to be throwing back and forth on your Y-axis.
My first crack at fixing this was to buy the official Official Creality Flexible Magnetic PEI Sheet.
It cut ~180g off of my weight but I think we can still do better and it seems there are several new, cheaper, and (possibly) lighter options:
- ATTENTION BEFORE USE:Firstly, please make sure the bottom of the soft magnetic sticker and the top...
- ALL NEW FUNCTIONALITY: Introducing the first ever removable, magnetically secured, build surface for...
- EASY MODEL REMOVAL: The first 3D printing surface designed with model removal in mind. This surface...
- CUSTOMIZABLE: The flexible surface can easily be cut to any demensions making it perfect for all...

- Excellent Adhesion & Removable - Upgrades magnetic build surface provides the best adhesion. Once...
- Easy to Install - The build surface adhesive comes with upper magnetic build surface and lower...
- DIY - The flexible surface can easily be cut to any demensions making it perfect for all build sizes...
- Universal - Ender 3/ Ender 3 Pro/ Ender 3S/ Ender 3v2/ CR 20/ CR 20 Pro/ Voxelab Aquila/Voxelab...

- 【High quality】Official Creality magnetic sheet is made of high-quality PC material, professional...
- 【Easy to take model】Easily remove the finished model from the 3D printer platform, leaving its...
- 【Easy to use】The build surface comes with an upper magnetic build surface and a lower magnetic...
- 【Product parameters】Size: 235 x 235mm. Compatible filaments: PLA and PLA substrates. Creality...
Step 3: Reduce friction
At high speeds there’s one thing for certain: you’re going to smoke the V-wheels on a stock Ender 3 series printer.
I’m currently testing various linear rails. While Amazon has several options (top 3 listed below) but they can be hit-or-miss, so we’ll be looking into other vendors’ options as well.

- These ADAPTERS REQUIRE MGN12H RAILS for the Ender-3/PRO and Ender-3 V2, The LENGTH REQUIRED is...
- Dual linear rails,more stable than single rail version and wheel movement system.
- Quick Installation and Upgrade
- For the Ender-3 V2 option, you need to print an additional Y-axis limit block to complete the...

- Compatible Models: This Creality Ender 3 X-axis linear rail kit is highly compatible with Ender3,...
- Streamlined upgrades: The linear guide rail kit exhibits exceptional wear resistance, smooth motion,...
- Enhanced printing precision: Crafted from high-quality high carbon chromium steel, the...
- Increased printing speed: The ultra-smooth and low-friction linear motion system reduces energy...

- 【Application】:The Creality X axis linear rail kit is special designed for Ender-3, Ender 3 Pro,...
- 【High Precision Printing】:The linear guide rail with high rigidity and high stability,which can...
- 【High Speed Printing】:The linear guide rail with smooth and low-friction motion characteristics...
- Made of high-carbon chromium steel,strong wear resistance,smooth movement,low noise,uniform force...
Be sure to sign up for updates as we work.