My first 3D printer purchase was a Creality Ender 3 V2. When it failed to stick filament to the build plate I googled everywhere for the answer, eventually searching for “how to calibrate e steps ender 3” and, after a lot of watching YouTube videos and studying forums, here is the stupid fast solution I found:
To calibrate e-steps on your Ender 3:
- Remove your filament and Boden tube,
- pre-heat the hot end,
- feed filament into the extruder and cut it flush,
- feed 100mm through the extruder,
- then cut that filament and measure it,
- divide 100mm/(measured length),
- multiply your result by your current e-steps value,
- save configuration,
- last run the test again (to make sure it worked.)
That’s the short version. But there are some little details that might help (including a simple calculator we created and a video to make life a little easier for you.)
Read on for more details, when & why 3d printers need e step calibration, a dead-easy calculator, and a walkthrough video and you’ll be able to calibrate e steps on an ender 3 in under 2 minutes.
Outline and quick reference
- Outline and quick reference
- What are E-Steps and Flow Rates?
- Why do I need to calibrate e steps? What happens if E Step calibration is not maintained correctly?
- Should I calibrate e steps? How do I know it's time?
- How to calibrate E Steps Ender 3
- Full video walkthrough of calibrating e steps
- FAQ
- Do I need to calibrate my 3d printer e-steps for each new roll of filament?
- I keep getting different estep values when I run the test on my 3d printer, what's going on?
- How do you fix extruder tension?
- How do I stop my 3d printer extruder from skipping?
- Help, I messed up something. How do I reset my Ender 3 V2 to factory settings?
What are E-Steps and Flow Rates?
E-steps, or extruder steps, is the calibration that tells your extruder stepper motor how far it needs to turn to extrude the amount of filament you tell it to extrude. It’s important to calibrate e steps in 3d printers because if they can’t calculate the correct e steps value it might think it’s extruding 100mm yet it actually extrudes 110mm.
More on the reason that’s bad, later.
Flow rate, technically “volumetric flow rates”, is the volume of material you push through your nozzle and is limited by the amount of heat that can be transferred to your filament.
How are e-steps and flow rates related?
When printing for speed, flow rate is your limiting number. You first want to calculate the max flow rate you can push through your extruder/hotend/nozzle setup, then calibrate your slicer software to print at the bleeding edge of that.
But there’s a problem…
If your e-steps aren’t calibrated, you might think that you’re pushing the correct amount of material through yet be pushing more or less filament than you’d though.
However, once you tune your e-steps you need to calculate flow rates and calibrate the flow rate in Cura/PrusaSlicer/your favorite slicer software – otherwise you might get over extrusion.
Why do I need to calibrate e steps? What happens if E Step calibration is not maintained correctly?
When 3d printing, poor e-steps calibration means that the amount of plastic being extruded is different than the amount of plastic expected by the slicer software and 3d printer. If the printer has doesn’t know how much filament it’s actually pushing through it can lead to gaps, blobs, and over/under extrusion.
However, if precise measurements matter then you must be sure you’ve calibrated your extruder steps. If you don’t, the g code you push will end up creating a slightly different sized print than what your slicer (and CAD program… and you) expected.
Should I calibrate e steps? How do I know it’s time?
If you’ve not had a chance to calibrate the extruder e steps, do it now. You really shouldn’t be 3D printing without correct e steps. Plus your hot end, your 3d prints, and your printer will thank you. Also, if you change your extruder gear or extruder motor then you definitely need to calibrate your extruder steps,
How to calibrate E Steps Ender 3
To calibrate e steps, you need to:
- Tell your 3d printer to extrude a known quantity of filament
- Measure exactly how much it actually extruded
- Divide the known number by the actual number to get an extrusion multiplier that you’ll save to your Ender 3’s calibration settings.
To do this:
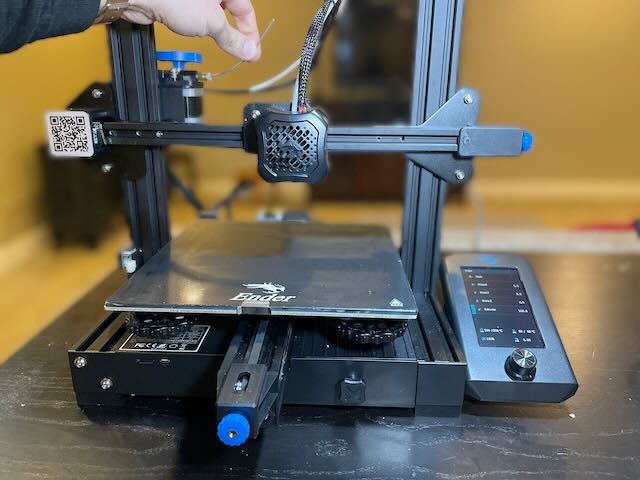
First, remove any filament from your 3d printer.
Next, remove your Bowden tube. I find it easiest to remove the blue clip (on the Ender 3 v2) and pull the Bowden tube out. This is because we want to extrude the filament into open air so clogs, heating, etc. don’t interfere with our measurements.
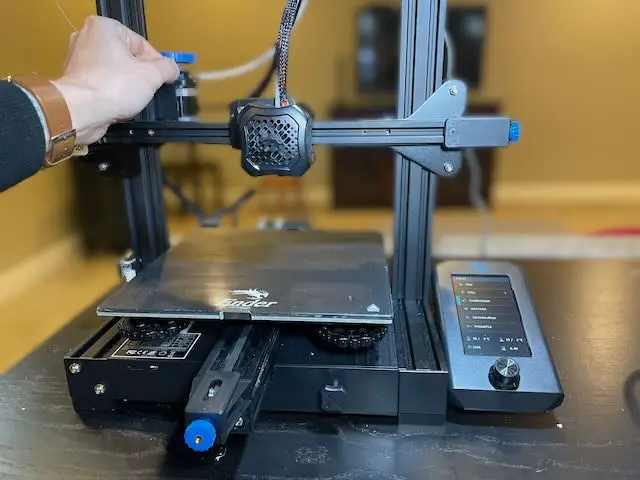
Next, preheat the nozzle by selecting “Preheat PLA”. Without being heated, the printer won’t turn and extrude filament, so even though the Bowden tube isn’t connected, you still need to preheat the nozzle (don’t get burned!)
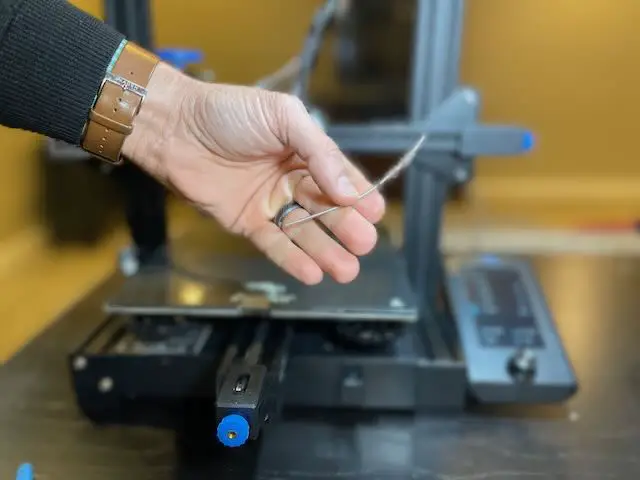
Then, feed filament into your extruder until it starts to poke out where the Bowden tube used to be. You’ll be cutting it so you really don’t need it to poke out much but make sure it’s extending at least 3mm out of the tube.
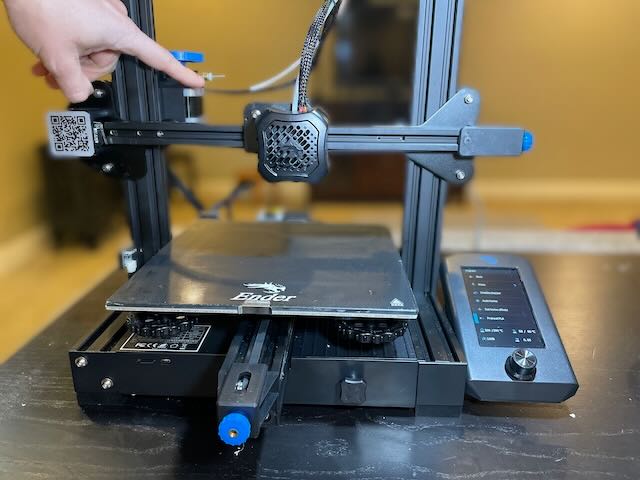
Got it poking out? Good… now cut it flush with the end of your 3d printer extruder.
Now that we have a set point, feed exactly 100mm through the extruder.
I’d never done this before, to do it go to prepare -> move -> extruder -> set to 100.0mm -> then push button to go.
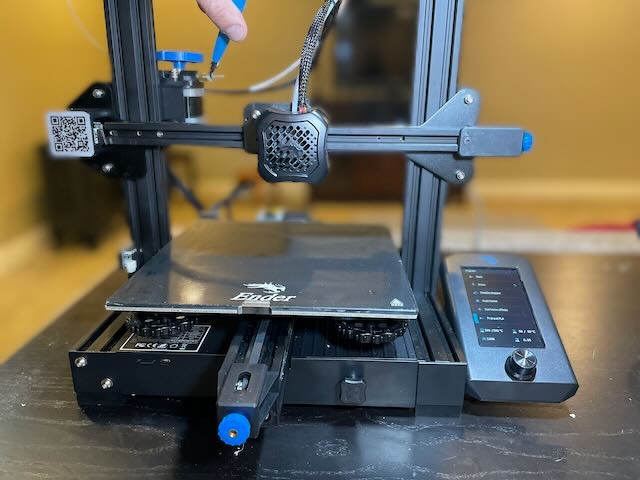
You now have “some amount” (close to 100 mm) of filament hanging out of where your Bowden tube normally is.
Cut off the filament as close to the extruder as possible.

Remember – the goal is to determine how much actually was extruded VS how much was expected… so consistency with where you’re cutting is key.
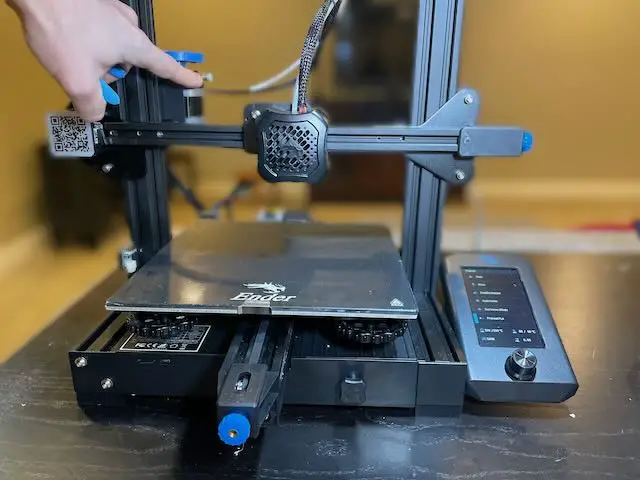
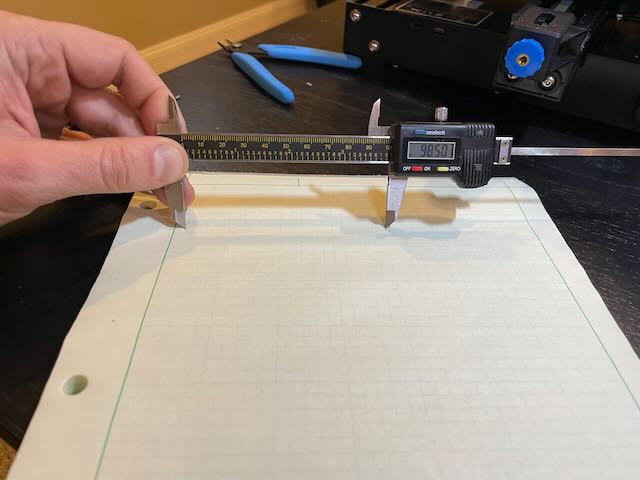
Now measure the filament – use calipers or a measuring tape accurate to at least half a millimeter.
I found this to be a pain, so I placed the filament on engineering paper, marked it, and used calipers to measure the markings.
Now, use this easy calculator to get your e step extrusion multiplier or divide 100/(measured length in mm):
mm
Expected amount of filament extruded (if 100mm, don’t change):
mm
Extrusion multiplier: 0
Once you have your extrusion multiplier you need to find the current e-steps value saved in your 3d printer.
On a Creality Ender 3 v2, do that by going to control -> motion -> Transmission ratio* -> Transmission ratioE
* Note: some guides say to look for steps/mm and steps/mm E. My (fairly new) Ender 3 V2 instead says Transmission ratio instead of steps/mm
The usual default is 93. Whatever yours is, multiply the number by your extrusion multiplier number (if yours is still saved above, just put it into the box below):
E step multiplier found before:
New estep value: –
Set this number you just calculated as your new e step value.
IMPORTANT: After setting the value you must save it to your 3d printer settings (or else it’ll revert on your next power cycle.)
To save, go to control -> store settings.
Your last two steps are to run the test again (to be sure your new value is correct) and do a flow rate calibration.
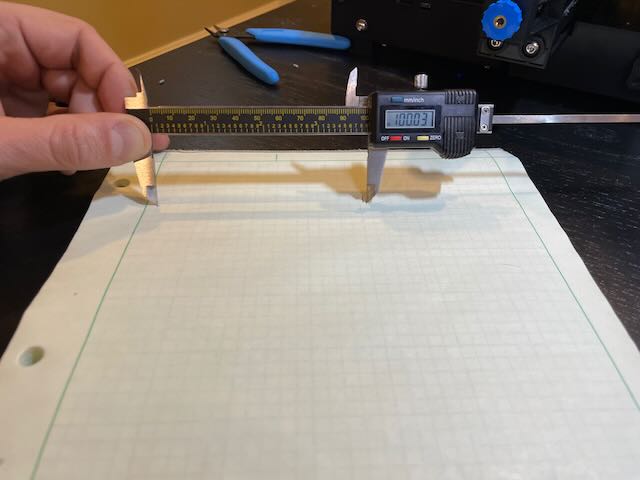
Notice how little difference it makes over 100mm. That’s why we extrude 100mm and not a smaller amount – we need enough distance to be able to calculate the difference/error.
If your new measurement is 100mm, that’s it, you’re done!
If not, run the test again and recalibrate. If you run the test one or two more times and keep getting different numbers you might have low extruder tension (likely caused by a broken extruder arm). See the FAQ for details on how to fix that.
Calibrating esteps on your Ender 3 V2 quick reference
Here’s the bulleted version to calibrate your e steps:
- Empty any filament in your 3d printer
- Remove Boden tube
- Pre-heat your hot end (nozzle)
- Feed a little filament back through and cut exactly at end of extruder
- Set your 3d printer to extrude 100mm of filament
- Cut the filament and measure it
- Use math to determine your extrusion multiplier (expected (100)/actual)
- Multiply extrusion multiplier with current e-steps value (the Creality default is 93 at the time of this writing)
- Set e-steps value (control -> motion -> transmission ration (might say steps/mm) -> Transmission ratioE (might say steps/mm E)
- Save (Control -> store settings)
- Run test again
- Test and calibrate your flow rate
Full video walkthrough of calibrating e steps
Learn better on video? Here’s the one we used for reference:
FAQ
Do I need to calibrate my 3d printer e-steps for each new roll of filament?
Technically yes, but many people set the e-steps once and calibrate flow rates for each filament roll. The diameter of the filament, viscosity, Shore hardness, bendiness, tube friction, and even your filament reel getting stuck or binding can have small effects on how much filament is pushed through on each step of the extruder stepper motor on your 3d printer.
So the real answer is yes, but you can usually do fine with just calibrating flow rate for each filament spool.
I keep getting different estep values when I run the test on my 3d printer, what’s going on?
You might be experiencing poor extruder tension – causing the extruder gears to slip slightly.
How do you fix extruder tension?
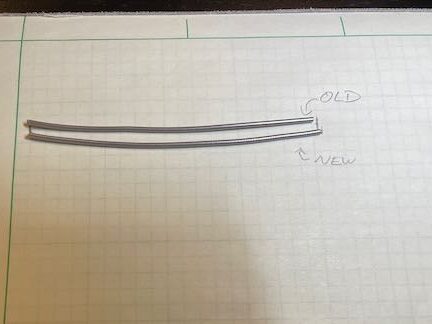
Often, low extruder tension is caused by a cracked extruder arm. Typically the underside will be cracked, so check that first. If it’s cracked .
If there are no cracks in your extruder arm, you can print this part to fix extruder tension.
How do I stop my 3d printer extruder from skipping?
If your extruder is skipping after calibrating your esteps, your flow rate likely needs calibration. How to fix a skipping or clicking extruder on an Ender 3 series 3d printer.
Help, I messed up something. How do I reset my Ender 3 V2 to factory settings?
To reset your Ender 3 V2 to factory settings, you need to manually send the G Code M502 to your printer. To do that, connect a terminal to your printer and send the code.