Stepper Drivers, Not Your Normal Motor?
Stepper Drivers are an important part of any 3D printer. We’ve covered a little about how your printer works. You feed it instructions in a language called GCode, which basically says “Up Z Axis, Increase Y Axis, Decrease X Axis, Extrude 1mm.” There is a small problem with this though: how do we know the printer is moving a millimeter?
Think about a typical motor, like the motor in a window fan or in your blender. It has basically two states: on and off. You can change how fast it’s going, but there’s no feedback exactly to say how much it’s moved. The motor is just getting more or less current, which causes it to move faster or slower. The RPMS could vary by hundreds of revolutions from moment to moment. It’s great for a fan, but if you wanted to move exactly 1 cubic foot of air, you wouldn’t have the control to do it, not enough precision or feedback.
The solution?
This is where the stepper motor comes in. The motor in your fan, washing machine, blender, and most other common appliances has perhaps four windings in it. These are electro magnets that attract and repel the armature, the metal shaft that goes through the motor. There isn’t a lot of precision with just four windings. In normal operation, they rapidly toggle on and off to force the armature to spin past them. If we left one on, the armature would point at it. Turn another on, it moves there. Maybe put on two at once, side by side, and we could get the armature stuck in between them. It’s not wired to do that, but that’s about what would happen. A stepper motor works on that principle, we turn on the windings we need to control exactly where the armature is.
In a stepper motor, the armature has teeth that are attracted to the windings. Each movement of a tooth to a winding is a step. There are typically thirty plus teeth on the armature. Thirty steps to a full rotation. Combine this with some gearing, such as the long threads of a 3D printer or the notches of a drive belt, and we’re able to get sub-millimeter precision. A step up from that, you take more direct control of the windings and you can do something called Microstepping, where you control the position between steps.
About Those Stepper Drivers
Stepper motors are more complicated than your typical electric motor. We can’t just toggle power on and off. We need to manage each of the windings inside the stepper motor. More than that, we need to control how much power we put in. This is going to take at least four wires to drive this thing. It’s going to take processing power to manage the flow of electricity from winding to winding in a controlled manner. Consider there are at least four motors, and probably more involved in your 3D printer, and it becomes a lot to juggle.
You have at least one for X, another for Y, and potentially two on the Z axis to raise/lower either the print head or printer bed, and you’ve got at least one for the extruder. There’s also accessories like a fan and heated print bed to keep up with. There’s only so much IO capacity on your 3d printer’s mainboard and it’s little microcontroller can only do so much at once.
This is where a Stepper Drivers come in. Your microcontroller will send basic instructions to the driver, “turn +four steps” and the driver will manage the rest. The driver will manage the current to the stepper, it will manage which windings are energized, and it could do a whole lot more. There’s a whole world of specialized functions your driver can do. The driver is a dedicated brain and switching hardware (typically MOSFETS). That little brain can have a wide range of algorithms baked in to enable microstepping for increased precision, stall detection for overloading the motor, low noise operation, and even higher voltage operation.
Let’s Download Some Drivers
(Just Kidding…)
We’re going to look at drivers from two major suppliers: Trinamic and Pololu. These companies both offer a variety of features at a wide range of prices. They have something that will suit your needs whether you’re looking for something cheaper to dabble with or are working to 3D print a cell.
Trinamic 2100 Stepper Drivers
The $5 Entry Item
This is a good, base driver to start experimenting on. It’s affordable for single-unit orders, and if you manage to accidentally pump 24 volts in because you misread that note about center-negative on your power supply… It’s affordable to break.

The features on offer at this price point are fairly barebones. Trinamic claims up to 256 microsteps per step, silent operation, and a peak output of 2.5 amps and 46 Volts DC. The 2100 also features current reduction when the motor is stationary, as it takes less torque to hold a position. Onboard hardware detects and prevents overheating and some shorting.
We feel this is an ideal driver for a beginner. You can quickly prototype on it and there’s nothing complicated or advance to wrap your head around. You hook up and immediately start stepping. It doesn’t offer a lot of fancy features, but it doesn’t have to. It’s just there to work.
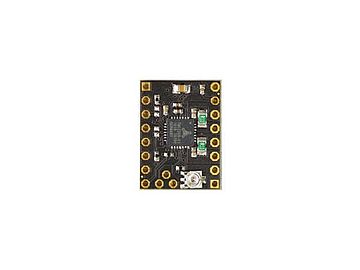
Trinamic 2130
The Other $5 Option
The 2100’s bigger brother, and it’s very nearly the same chip. The extra few cents you pay gets baked-in support for load-dependent speed control, stall prevention, lower temperature operation via their fullStep option, current sensing, passive braking and freewheeling, and otherwise, all those features of the 2100. Kinda funny that these almost cost the same, right? (More on that later).

Going with the 2130 means dealing with its added features, which isn’t always a plus. It’s easy to get sidetracked by all these extra options, having the ability to more precisely manage the speed of the driver or monitor the motor’s load are nice things. These nice features also have a cost: your time. Going with a more advanced driver may not greatly impact the cost to the home hobbyist or even small professional, but taking advantage of those features, will take time to study, code up, and implement.
If you’re just learning about stepper motors, this isn’t an ideal situation to start in. Having these features is tempting, and you might add them to your code, and get hung up when something doesn’t work quite as you expected. It can prevent you from learning the basics. We recommend this driver to intermediate users who already understand stepper operation and firmware modifications.
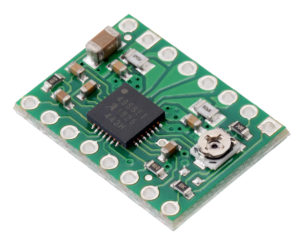
Trinamic 2208
The Actual Barebones, Budget Option, for $2
You would expect the 2200 to have more features than the 2100. An Intel 8700 is generally better than an Intel 6700. That pattern doesn’t hold true here. The 2208 is a more bare-bones option. It’s key features are silent operation, interpolation, passive braking, freewheeling, and a sense resistor. Of the three Trinamic’s we’ve looked at, this one even has the lowest operating voltage, just 36 Volts DC and a max output of 1.4 amps.
There is, however, one big difference we found: the control interface. The 2100 and 2130 use SPI. The UART implementation here is for single-wire operation. SPI is a faster interface, but it takes more wires to run. Configurations like this are ideal for optimizing the cost of your hardware. If you want to cut down on the cost of a product, and your hardware has unused features, you cut them out.
We don’t recommend this driver to the average DIY’er. This is something designed for use in bulk production. If you’re making a batch of 100 custom-made 3D printers or some other bulk production, that’s where this shines. It’s a low-cost option where lower features are needed to deliver on an exact idea.
Pololu A4988
Straightforward Stepper Drivers
We like Pololu’s branding and documentation for their drivers. Everything we could want is right in front of us. Their A4988 is a straightforward, easy-to-deploy driver. It can handle up to an 8-wire stepper motor, provides 16 microsteps per step (but can be configured for fewer), allows users to increase the output voltage to increase stepper speeds (at your own risk), and ships with your standard current, short, and thermal protections.
This is another strong contender for a hobbyist just getting into stepper drivers. We believe the driver is easy enough to operate, the documentation is through, and at $6, it’d be easy for us to throw are money at it to dive in on the field.
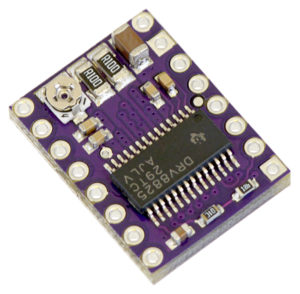
Pololu DRV8825
Revenge of the Features
If the A4988 are straightforward stepper drivers, then the DVR8825 is the go-anywhere version of that. It offers 32 microsteps per step, operation of to 45 volts and with enough cooling will push 2.2 amps per coil. It’s a drop in replacement to the A4988 with nearly identical pinout, so perfect for an in-place upgrade. And most importantly we think, is that it can run on 3.3 and 5 volt systems. Built-in regulation on the board allows for just a little more flexibility.
You might not think multi-voltage support is a big deal, but it can be. When you’re designing electronics, everything has their own voltage requirements. You might use a 5 volt raspberry pi, you might have a relay board at 3.3 volts, you might have a lower power micro controller at 3.3 volts, there could be a screen running at 9 volts. Power management gets to be an issue. This board will perform better than it’s cheaper counterpart, it’s still straight forward to operate, and it’s more forgiving about operating voltages.
This is a $9 driver, so it’s not quite as cheap as the competition, but it’s robust design makes it an easy upgrade choice from other Pololu boards, and we think it might even be a good starter board. It’s not dripping in overly complicated features, it just works and gives users a little extra performance and compatibility along the way.
A Note About Stepper Drivers Pricing
You might’ve noticed something about the Trinamic Parts: Their resellers offer bulk pricing, and in many instances default to a order of 2000 units. That’s the market Trinamic is focused on. At that level, the pricing difference between the 2100 and 2130 is a bigger deal. For a consumer, you would happily drop an extra dollar for the added features. For a camera manufacturer or other large-scale production, the math is different: get 2000 units with out the extra feature, or get 1400 with the extra feature. You need to justify those costs by using the extra features, or go for the cheaper unit. It doesn’t cost a lot in the individual scale, but those pennies add up.
Trinamic
Trinamic is aiming for the bigger fish in the pond, they want to sell to companies that’ll think nothing of a six figure order. The advantage here is that you know their hardware will be supported for years. You can’t sell fifty thousand units to a large manufacturer and then say “oh, sorry, we won’t make it any more. Buy fifty thousand of our new product to get support.” There are some advantages in buying from the professional manufacturing market.
Pololu
Pololu, on the other hand, seems far more focused on the hobbyist and maker space. Their website provides pricing up to 100 units for bulk ordering, about enough for a small, custom manufacturing run at a makerspace. Their documentation is rich, with pictures and details to tell you the most about their products. Admittedly with Trinamic, they give you their trademarked names for the features and you don’t know anything until you get the datasheet.
With that in mind, we would give some heavy weight to Pololu if you’re trying to learn about Steppers and Stepper Drivers. Communication is a powerful component in making use of anything in the maker and design space.
Need Help configuring Marlin Firmware?
So the drivers don’t care if the controller is 32 bit or not? If I have a current board with 4 a4988’s those could just be moved to a 32 bit board? I also read one fellow indicating he was using one set for the endstops and a different chip for the extruder because it functioned better there…any thoughts on that with the “cheap options?”
As for the two @ $5. What about buying the one with the bells and whistles and then using it as the barebone till you get farther down the line?
Hey Rudi!
Great questions. Yeah, you can mix & match drivers based on your component needs. They are compatible with both bit types mainboards.
I would suggest running some cheap ones and learn to dial them in. Then after you get familiar with voltage adjustment and firmware settings get some really good authentic ones. I am sure there have been some updates since we last wrote this so I’ll add it to the list to update. Thanks for the comment!
Is there a Marlin command that will identify which drivers are installed on a mainboard?