One of the most annoying things in 3D printing is to see a print fail. You come back to your 3D printer to see how your model turned out, only to find gaps in your 3D print. Yikes!
So how do you fix gaps in 3D prints? Let’s take a look:
Gaps in 3D prints are usually caused by under-extrusion, printing temperature, and speed. Re-leveling your bed, slightly increasing the printing temperature, or decreasing the speed can reduce any gaps in the layers of your 3D printed model.
There are 3 places you can find gaps in your 3D print, so feel free to skip down to the section which is relevant to you:
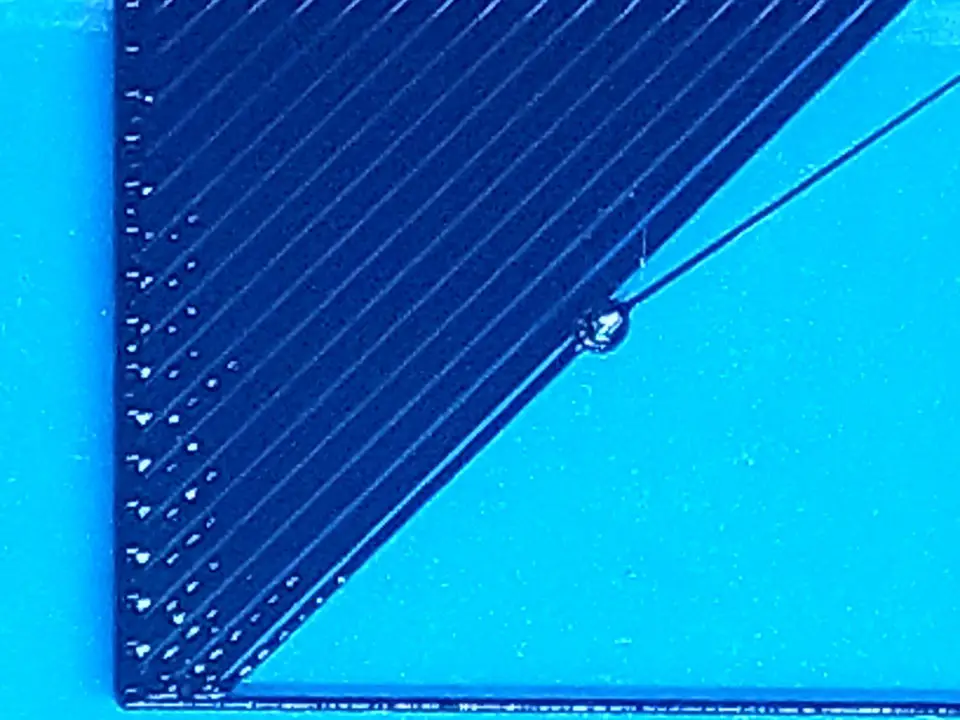
Credit: u/OutsideAnywhere
Gaps in the first layer of your 3D print
As a 3D printing enthusiast, you know that the first layer of your 3D print is the most critical one. A good first layer is the differentiating factor between a successful and failed 3D print.
The first layer of your 3D print can have a few different kinds of gaps, so let’s look at what those are and their fixes.
Gaps between lines
If you lift up your 3D printed model and see that there is a visible gap between each line the printer put down, the issue is most likely because the nozzle is too far from the bed.
When the 3D printer puts down the first layer, the filament actually needs to be slightly squashed into the bed. That’s why the first layer’s extrusion width is a little wider than that of the next layers.
Gaps between the lines of your first layer mean the filament is not being squashed enough.
To fix this, you can do one of two things:
- Adjust your Z-offset to bring the nozzle closer to the bed
- Re-level your bed manually
Also, before starting a large 3D print, consider printing leveling squares to see if your bed is truly level and if your first layers will come out correctly or not.
Some areas of your first layer don’t have any material
Another common first layer gap problem is when some parts of the first layer print correctly, but other parts are transparent or even missing!
This problem is the opposite of seeing gaps between lines. Here, the nozzle is too close to the bed, so there is not enough room for the filament to flow and make a good first layer on the bed.
To fix this, the solution is the same as above:
Re-level your bed! The Z-offset won’t help here because only some parts of your first layer have gaps. This means the bed is properly leveled on one side, but it’s too close to the nozzle on the other side.
You can just eyeball which side of your print has this issue and lower the bed on that side.
For best results, use the leveling squares to get your first layer just right.

Random holes in your first layer
Sometimes, you will see holes and gaps in odd places throughout your first layer. These are usually not caused by anything specific, but adjusting your first layer settings will take care of this problem.
Gaps in the wall of your 3D print
So your first layer printed fine, and your model is slowly building up, only to have gaps in the walls of your 3D print!
A 3D printed builds an object by putting down layer after layer of material, so if there is something wrong with the way one layer is extruded after the next, you may see gaps in the walls of your model.
Layer separation
This is the worst kind of gap in your 3D print, because it basically makes your 3D printed model unusable. Layer separation is when two or more layers that should have fused together end up completely splitting, revealing a gaping hole in your print.
To fix layer separation, here’s what you can adjust:
- If you are printing with PLA, try slightly increasing the nozzle temperature. Extruding your filament a little bit hotter will help one layer adhere to the next. You can also try adjusting your cooling settings to reduce the fan speed. Layers can also separate if you’re printing too fast, so you can reduce the printing speed as well. If you have the patience, try these solutions one-by-one. If you’re in a hurry, adjust all of these parameters at once!
- If you’re printing with ABS, Nylon, or other materials that tend to warp and contract, consider building an enclosure to help retain heat inside the printing area
Tiny gaps and pockmarks in walls
Sometimes, a 3D print can turn out mostly fine, but some parts of the walls will have tiny gaps or pockmarks in them. It’s not enough to make a print unusable, but it’s enough to make it visually unappealing.
There are lots of possible causes for these holes and pockmarks, such as too fast of a printing speed, misconfigured retraction settings, or poor filament quality.
Here’s how to fix it:
- Slow down your print speed. Sometimes, the nozzle moves too fast for enough filament to be deposited, resulting in small gaps
- Make sure your extrusion settings are correct. You can calibrate your extruder to see whether your 3D printer actually extrudes as much material as it thinks it is extruding
- Use dry filament. PLA is very hygroscopic, which means it absorbs moisture very easily. If there is moisture in your filament, it will evaporate and expand as it heats up, resulting in tiny gaps and bubbles
Gaps in the top layer of your 3D print
Finally, one more place you can find gaps in your 3D print is the top layer. The top layers “seal” your print, so if these have gaps in them, they can really ruin the looks and sometimes the utility of your 3D print.
Gaps between lines
If you’re running into this issue, the top layer(s) of your 3D print will not be properly sealed. You will be able to see gaps between the lines of the top layer, letting you peer down into the abyss of your 3D print’s infill!
These gaps greatly reduce the strength of your print and you may even be able to puncture the top layer with just your finger.
Here’s how to fix it:
- Use more top layers. Often, the first one or two top layers will have gaps in them. Unlike the first layer which gets squashed onto the bed for a complete seal, the top layer is laid down on a lot of air because of the gaps in infill. This doesn’t let the filament spread as it should, resulting in gaps. Increase your top layers by one or two and that should solve the problem
- Alternatively, you can use a higher infill percentage, at least for the upper layers. This will provide a more solid foundation for the top layers to sit on
Wall gaps
Wall gaps are where there is a gap between the outline and inner lines of the top layer. This is especially noticeable when the outline is circular. You may notice tiny gaps between the lines and the curvature of the outline.
Here’s how to fix it:
- Cura and Simplify3D both have specific functions to help deal with this. In Cura, it’s called Infill Overlap. In Simplify3D, it’s called Outline Overlap. Adjusting these settings can help fix wall gaps
More tips for gapless prints
Use high-quality filament
Many times, 3D printing problems can just be attributed to poor quality filament. Don’t cheap out on filament, as it ends up costing you more in the long run thanks to failed prints.
Also, store your filament properly. Keep it in an airtight plastic box and throw some desiccant into it to absorb any additional moisture.
Print at slower speeds
As a general rule, print at slow speeds. Don’t try to max out your printing speed, as it will most certainly cause some problem or the other.
A good print speed for PLA is between 50 to 60 mm/s for most hobbyist 3D printers.
Clean the print bed
First layer problems sometimes have an unexpected culprit: a dirty print bed! Microscopic bits of filament can get stuck on the bed, messing up your first layer.
Use a paint scraper after every print to get all the bits and pieces off.
For best results, use a layer of painters tape on the bed that you can just remove and replace when it gets too bad.
Clean the nozzle
Finally, a clogged nozzle can outright block filament from flowing correctly, which can result in gaps in your 3D print. Cleaning a nozzle is a pretty standard procedure for any 3D printing enthusiast.
Conclusion
Gaps in 3D prints are very frustrating, but there are lots of potential solutions for this problem. Trial and error are the way to go!