If your 3D print looks kind of haunted by the ghosts of layers past, you’re probably running into an issue known as ghosting. 3D printing has a lot of different terminologies, so ghosting is also known as ringing, echoing, rippling, or just plain ol’ vibrations.
Ghosting can really ruin the finish of a 3D print, and it may seem quite frustrating when you run into this issue. However, it’s quite easily fixed with a few tweaks to your printer, so let’s get right to it.
How to identify 3D print ghosting
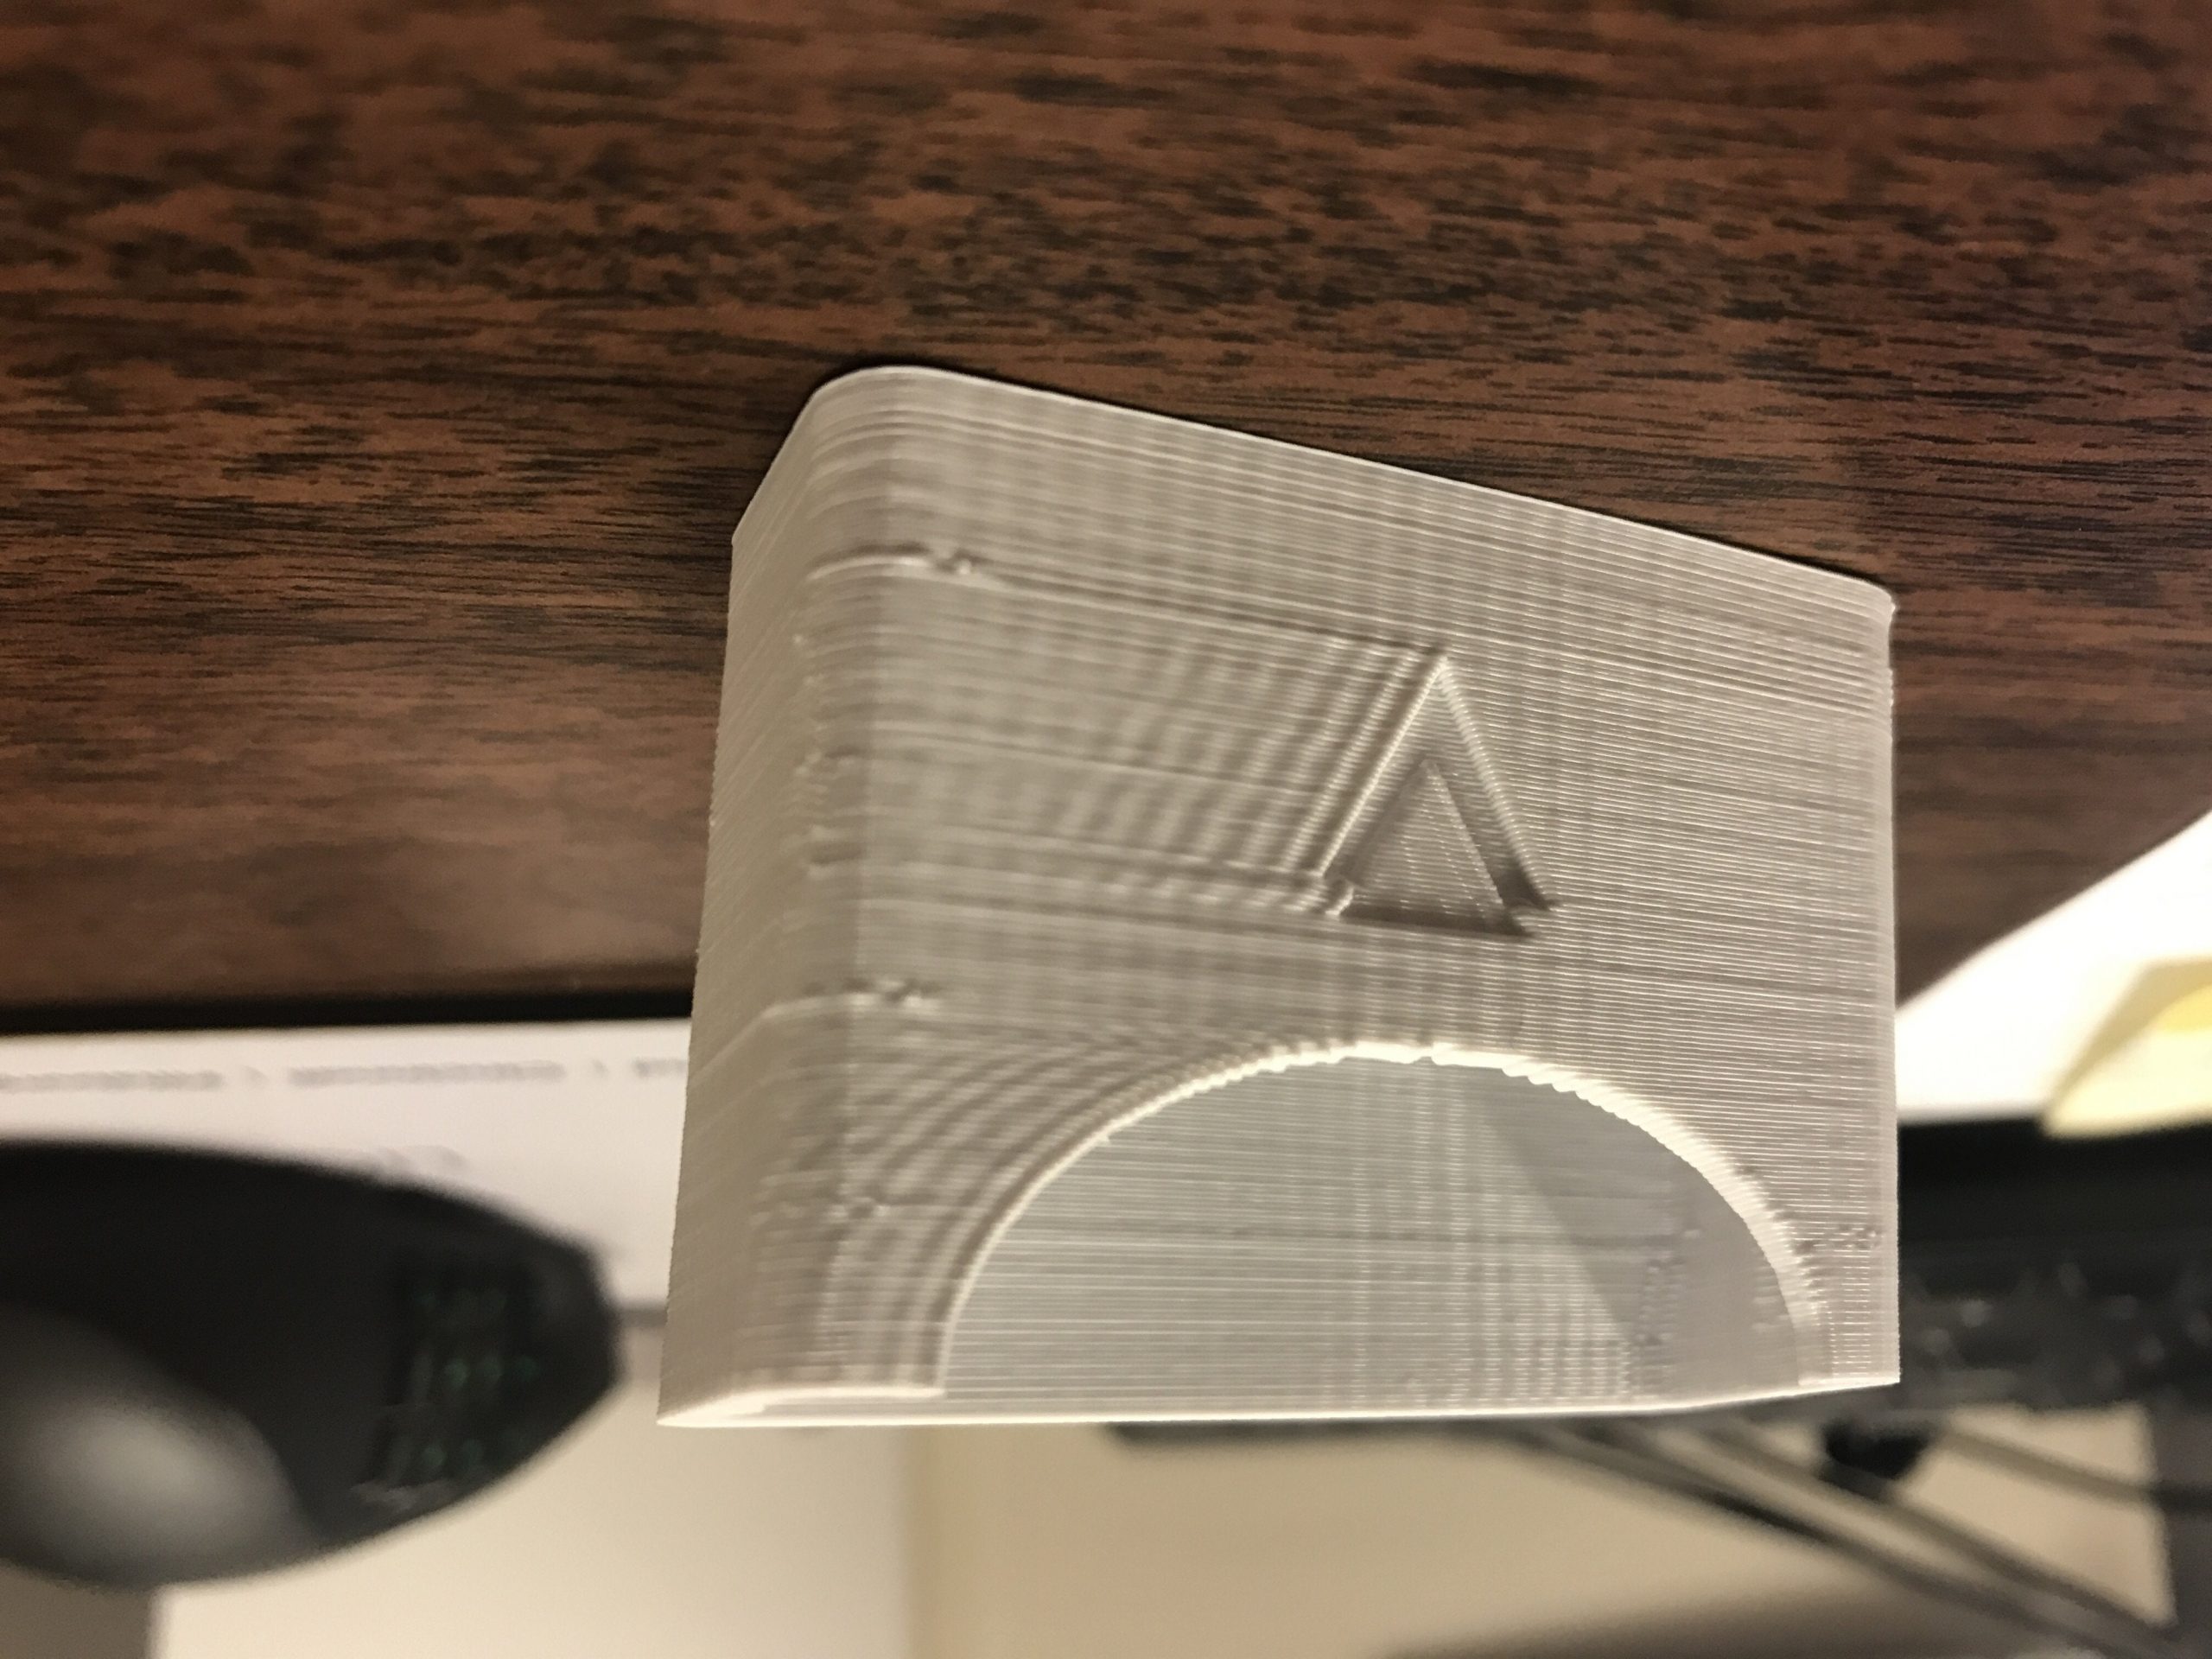
Ghosting(ringing, echoing, rippling, vibrations) is usually present if you see weird patterns in the finish of your 3D print. A typical 3D print should have clean layers one on top of another.
A 3D print with ghosting will have weird “images” or patterns in the finish: these may look like waves, circles, or funky shapes.
The best way to test for ghosting issues is to print something with a big flat surface, like a cube. It will be very easy to spot the effects of ghosting or ringing on the face of the cube.
What causes ghosting in a 3D print?
Ghosting is caused by vibrations in your 3D printer. The vibrations occur due to the movement of the 3D printer’s mechanical parts. The bed and nozzle moving back and forth rapidly are the culprits here. The movement causes the entire 3D printer’s frame to vibrate, and these vibrations in turn appear in your print.
You may not notice your printer vibrating as your print is in progress, but you’ll be able to spot it in the final print.
Related: How to fix Z banding and wobbling
How to fix 3D print ghosting
There are quite a few ways to fix ghosting, so let’s get to it.
Solution 1: Decrease your print speed
Often, ghosting and echoing can be solved by simply decreasing your print speed. Since the movement of the nozzle and bed is responsible for causing the vibrations, slowing down their movement can do the trick.
If you noticed ghosting after increasing the print speed, this is the most likely culprit and the simplest solution to try.
Go back to a print speed that you know worked for you in the past, and see if that eliminates the issue.
If not, try the next solution.
Solution 2: Make sure your printer is on a stable surface
This kind of goes without saying, but if your 3D printer is on a wobbly table, the wobbles from the table are definitely going to show up in your print.
Maybe the table was fine when you first put your printer on it, but over time, the screws and joints have become a little loose.
Check and see if the surface your 3D printer is on is stable and if not, tighten it up or stabilize it to eliminate the vibrations.
Solution 3: Make sure your printer’s frame is sturdy
3D printers undergo a lot of movement and force, so over time, some parts of the printer may become slightly loose. The small, unnoticeable vibrations from hours and hours of printing may cause a nut to loosen up here or there.
Check all the joints in the frame of your 3D printer and make sure there is no unnecessary movement.
Tighten down all the corner brackets, wheels, rails, and bolts. Just go from bolt to bolt and give it a small turn to make sure it’s fine.
If the joints are fine but the frame is still shaky, you may need to use an external bracket or support to stabilize the frame. This is often the case with 3D printers that have very tall Z axes – the tall frame has a tendency to shake.
Adding an extra corner bracket or reinforcing the gantry with a 3D printed brace can help remove unwanted movement.
If that still did not solve the problem, try the next solution
Solution 4: Tighten the belts
Loose belts can also result in sloppy 3D prints. This is because the full extent of the movement is not transferred from the stepper motor to the axis, so the nozzle ends up slightly out of place.
Tightening the belts of your 3D printer can go a long way to improve your 3D print quality in general.
You can either undo the belts and pull them tight again, or you can print a belt tightener and clip it to the belt.
The simplest belt tightener is a little device that fits over the belt and has a hole for a bolt to go in. Tighten down the bolt until it hits the belt and begins to push it down. This added tension will transfer throughout the belt and it will become tighter.
Alternatively, you can print more complex belt tighteners that fit into your 3D printer’s frame. These usually have a thumbwheel you can use to make micro adjustments to the belt.
Basically, your belt should not have any sag in it and it should be quite taut even if you pluck at it.
Solution 5: Adjust jerk and acceleration settings
Acceleration and jerk settings are important settings in your 3D printer that you don’t normally think about because the manufacturer defaults are usually good enough.
If for whatever reason you need to change them, here’s how they work:
The acceleration setting determines how fast the axis gains speed.
The jerk setting determines how fast the axis changes direction.
It’s like high school physics all over again 🙂
Misconfigured jerk and acceleration settings can generate a bit of unwanted inertia that ends up translating into your 3D print. Try decreasing the acceleration and jerk settings in small decrements until you’re satisfied with the finish of your 3D print.
However, be wary of decreasing your jerk and acceleration settings too much. Doing so will result in your 3D printer’s nozzle not moving fast enough, meaning details will become fuzzy and mix with the rest of your print.
The reason jerk and acceleration settings are so far down on this list of solutions for 3D printer ghosting is because they’re so finicky to adjust.
You may also be able to find ideal settings for your specific printer on a forum.
Solution 6: Reduce the weight on your printer
The more weight that is on your 3D printer, the more chances you have of running into vibration issues. For example, if you mount your filament roll on top of your 3D printer, that’s potentially an extra 1 kg of weight that will be subjected to the inertia from the moving parts of your printer.
By moving the filament holder to the side of the printer, you may be able to reduce the inertia just enough to eliminate any ghosting effects.
You may also find that direct drive extruder printers have this issue as well. Since the extruder stepper motor is quite heavy, it’s a lot of weight moving around with the rest of the printer.
Solution 7: Add vibration dampeners to your stepper motors
One more thing you can try is to add special vibration dampeners to your stepper motors. These go between the stepper motor and the place where the stepper motor is mounted on your 3D printer frame.
These help eliminate any ghosting that is caused by the stepper motors themselves, as the moving motors may also add unwanted vibrations.
Most 3D printers don’t have these installed as part of the stock configuration and still work fine, so the stepper motors are actually not that much of a culprit when it comes to vibrations.
Still, if you’ve tried everything else and have not been able to find a good solution, these are worth a shot:
Conclusion
Fixing any problem in a 3D printer requires time, patience, and trial and error. Ghosting and echoing is no different. However, with a bit of persistence and coffee, you should be able to eliminate ghosting using the 7 methods we’ve listed above.
Try the simplest ones first and work forward from there.
You may find that you need to do multiple prints and spend a roll or two of filament to get the issue fixed, but that’s just the way 3D printing works!