Can you really 3D print a 3D printer, and how do you do it? In this article, we’ll answer just that. The answer may surprise you, so get ready to enter the world of self-replicating machines!
Can you 3D print a 3D printer?
Yes, you can 3D print a 3D printer. There are a few designs out there that are self-replicating, meaning you can build or buy a 3D printer and then 3D print new ones using it. This only applies to the plastic parts of the 3D printer, though. You’ll have to buy some parts like electronic components and rails.
How do self-replicating 3D printers work?
The idea of a self-replicating 3D printer is a 3D printer that prints more versions of itself. This usually applies to fused deposition modeling(FDM) printers only, though you could hypothetically print an SLA printer as well.
3D printing your own 3D printer is not as simple as pressing a button and having a new 3D printer at hand, though.
The limitations of additive manufacturing and 3D printing technology are that you can only 3D print certain parts of the 3D printer.
You’ll have to create every object separately and then assemble it yourself into a functioning 3D printer.
You’re also limited by the size of your print bed. A small print bed can only make small parts, so you’ll have to do a lot more 3D prints before you have a working printer.
As such, it’s best to think of 3D printed 3D printers as a process more than a magic technology.
The first person to make a 3D printable 3D printer was Dr Adrian Bowyer, who designed the Reprap.
RepRap
The RepRap (rapid reproduction) was a revolutionary idea. It was the first 3D printer that you could build, print more parts for, and make another version.
The original RepRap was the base for nearly all consumer-grade 3D printers that are available today. Of course, many manufacturers have opted for injection-molded or metal parts instead of 3D printed parts, but the general idea is the same.
Prusa i3
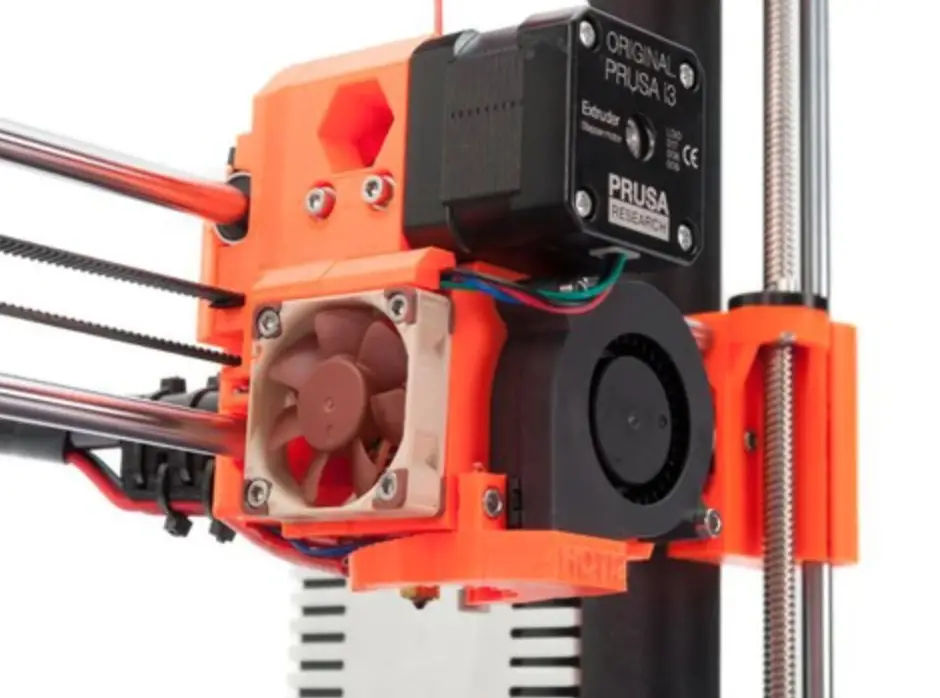
Developed by Josef Prusa, the Prusa i3 was the first mass-produced self-replicating 3D printer. The Prusa i3 has since undergone many iterations: the original Prusa i3, then the Prusa i3 MKII, and the Prusa i3 MKIII.
Prusa Research has their own 3D printing farm where they have shelves and shelves of 3D printers(Prusas, of course) all printing parts for new Prusa printers.
All plastic parts on the Prusa i3 are printed with ABS filament, and the rest of the parts are metal or electronic components.
Prusa Research’s current setup is the ideal manufacturing process for 3D printed 3D printers.
The Prusa setup is open source, which is why many 3D printer manufacturers build their printers based on the same processes. Prusa’s magnificent engineering has redefined the industry and and transformed the business of 3D printing.
How to 3D print your own 3D printer
So if you were to actually go out and 3D print your own 3D printer, how do you go about it?
Do you have a 3D printer or will you source parts?
This is an important consideration to begin with. 3D printing is far from perfect, so chances are your parts will have to undergo a few iterations before they’re ready to use in a 3D printer.
If you already have a 3D printer, printing all the plastic parts yourself will make the project much easier.
You should also be prepared for some wasted plastic material, as there are chances some prints will fail.
There are usually quite a lot of parts to 3D print, so outsourcing the 3D printing may become very expensive. This is because you’re paying someone for their printer, material, and most importantly, time.
If you don’t have a 3D printer at home, try to find a library or community college that has a 3D printer you can use.
What you can 3D print
What parts of your 3D printed 3D printer project can you actually print?
Brackets: Most of the brackets that connect the parts of your 3D printer’s frame can be 3D printed at home. These are the parts that connect rails and extrusions to each other and hold the entire machine together.
Carriages: In an FDM printer, every axis has a carriage on which the stepper motor is mounted. There will be an X axis carriage, a Y axis carriage, and one or two Z axis carriages. These can all be 3D printed.
Hot end assembly: The plastic part that houses the hot end is also 3D printable. You need to have some way of mounting the hot end to the gantry. Most commercial 3D printers also have community-designed mods for this part, so they’re quite common.
Print bed mount and assembly: The entire 3D printer bed assembly can be 3D printed. This includes the mount and any brackets that hold the bed to the frame. The only thing you need on top of this assembly is the actual bed itself, which will come under electronics.
Control panel housing: The mainboard and the LCD screen housing can also be 3D printed. Usually, this will be a box of some kind where the mainboard will sit. The LCD housing can either go on top of this or be mounted separately.
Power supply mount: The power supply is quite a large part of your device. It takes up a lot of space, so you can either mount it vertically like the Prusa does, or you can keep it separate to the side of your machine. Either way, the mounting plate for the power supply can be 3D printed.
Filament spool holder: Mounting the filament spool is sometimes an afterthought, but it’s a critical piece of equipment in additive manufacturing! You can print a spool holder for your filament roll and mount it on top of your 3D printer, or you can print rails that sit to the side of your machine.
The entire frame: While you could 3D print the whole frame of your machine, it will not be as stable as a machine built with aluminum extrusions or something similar. Plastic is not as stable as metal, and you’ll probably end up using a lot more material than you would have otherwise. All that extra printing will also significantly raise the cost of your project.
Extruder housing: There are many extruder designs available on sites like Thingiverse that can be 3D printed. This is only the housing and mount, though: you’ll still need to buy stepper motors, gears, and couplers.
Other small parts: There are plenty of other small parts like filament guides and screw holders that you can print. It all depends on the design you are following.
What you need to buy
Now that we have printed all the stuff that could be printed, here’s the rest of your shopping list:
Hot end: Hot ends must be bought, and the hot end is the most critical part of a build. A good hot end ensures that filament flows evenly and properly at all times, and good temperature control.
Stepper motors: Good stepper motors ensure your printer can do really fine movements. Standard stepper motors are fine and there are even tutorials that call for removing stepper motors from old DVD drives. Still, they’re quite cheap, so you can easily find them online.
Aluminum extrusions: Extrusions are the best way to make a frame for your 3D printer. They also provide a good path for rails or wheels to move the axes back and forth.
Lead screws and rails: Lead screws and rails help the axes move/slide back and forth. The Snappy 3D printer we’ll discuss below has printable lead screws, but for the best result, you’ll want to use proper metal ones.
Drive gears and bearings: You’ll need bearings for the extruder and drive gears for the stepper motors. The gears attach to stepper motors and move the belts which pull the axes back and forth.
Belts: Belts are pretty easy to find, and good quality, tight belts will ensure your movements are precise.
Limit switches: Limit switches are super important as they tell your main board how far the axis’ extreme is. You’ll need 3 of these of each axis.
Heated bed: The heated bed is an electronic component so you’ll need to buy it. You can get away with a plain aluminum or glass plate that does not have any heating, but heated beds are so cheap nowadays that it’s just better to buy a proper one.
Control board and power supply: The control board is the brain of your 3D printer. You can opt for 8-bit or 32-bit boards. 32-bit boards are much more powerful and you’ll get much better prints as a result. You’ll also need a 12V or 24V power supply.
Other hardware: Finally, you’ll need to add some bits and bobs like nuts, bolts, and washers to your shopping list to put the whole 3D printer together. You’ll need some wire, too.
Related:
Build plans to follow
Snappy Reprap v 3.0
The Snappy Reprap is a really unique 3D printer that you can almost entirely 3D print. Aside from the electronics, everything else is 3D printed.
It’s a remarkable design and a really fun project to do.
The only caveat with the Snappy Reprap is that the print tolerances need to be very tight. If the tolerances are off, the parts will not fit together correctly.
This presents a kind of “chicken and egg” problem, as you’ll need a really dialed-in 3D printer to make said 3D printer.
It’s unlikely that the Snappy itself can replicate itself, but it’s certainly worth trying. The creators really put a lot of thought and effort into the design!
HyperCube 3D printer
A more advanced and robust 3D printing project is the HyperCube. This is a CoreXY style machine and it’s quite an advanced build. There are over 40 3D models that you need to print, but the majority of the frame is composed of aluminum extrusion bars and metal parts.
With a little bit of tuning, this can be a really powerful 3D printing machine capable of handling a wide variety of materials.
There are also other designs that you can find online, but these are by far the best.
Conclusion
3D printing your own machine sounds incredibly futuristic. Self-replicating machines are one of those things we hear about when we talk about technologies of the future. It’s unlikely that a 3D printer will ever produce a 1:1 clone without any human input, but it’s really close!