3D printing is a phenomenal hobby, but it’s not without its headaches. The amount of trial and error involved can be pretty time consuming. This is especially true when it comes to curing your resin prints. How long should you cure resin prints for anyway?
The reality is that most prints should be fully cured within a handful of minutes. Take care, though – there are myriad factors that can impact how long you’ll have to wait until your project is good to go.
On this page, we’ll help you find an answer that works for your setup. We’ll run through the most common things that can speed up or slow down curing times. Our guide towards the bottom of this page will also explore how to avoid over-curing.
If you’re scratching your head staring at your resin prints, hopefully this page can help!
Factors to Consider When Curing Resin Prints
Spoiler alert – most resin prints are cured within a handful of minutes. Your best bet is to familiarize yourself with what a cured print looks like. This way, you can pay attention to the changes you notice rather than limiting yourself to rigid timings.
In this section, we’ll run through the different factors that can impact your curing time. The clearer you are about what can influence this process, the easier it will be to nail it every time!
The Size of Your Project
The surface area of your build is going to play a big role in how long the whole thing takes to cure. As you may have guessed, this is fairly straight-forward – larger builds tend to have slightly longer curing times while smaller builds can be done much more quickly.
When exposing your project to UV light, it’s important to rotate it at regular intervals. This will ensure that your whole build is cured at an even rate. Over time, you’ll develop an eye for how long you’ll have to wait with different sizes of projects.
Until then, maintain an eagle eye and pay close attention.
Shape
Is your project super intricate, or is it simple with solid blocks? Tons of interlocking parts? The complexity and form factor of your prints play a big role in how long it takes for them to cure.
If you regularly print projects that have a high level of complexity, it might be worth picking up a rotating UV light stand or chamber to take some of the guesswork out of your printing projects.
Many products like the one linked above come with a UV-powered base. Simply point a UV light at it and it will start rotating automatically. This can give you a much better chance of curing your projects evenly and effectively.
Be sure to check online reviews and comparisons before pulling the trigger.
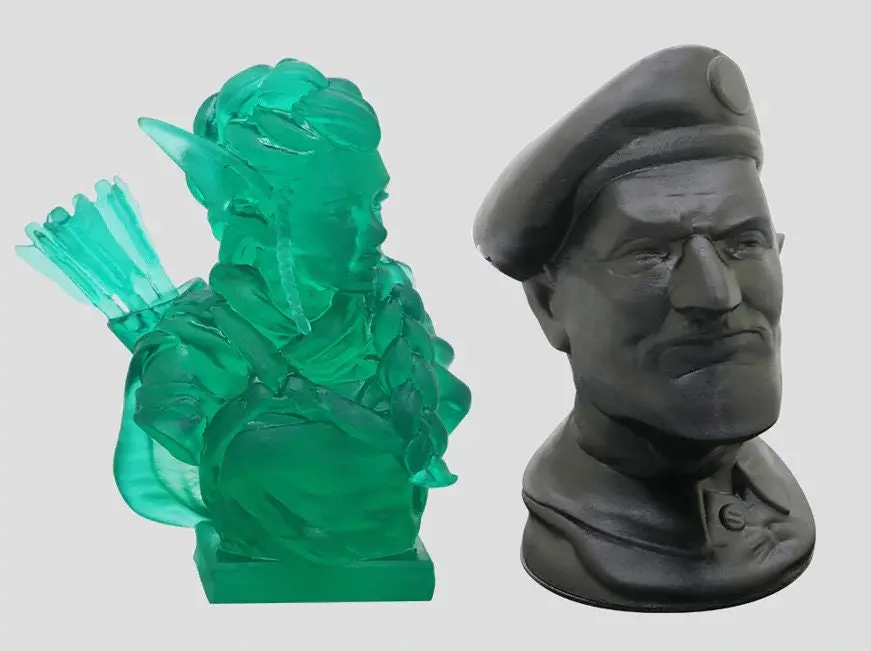
Opaque VS Clear Resin
What kind of resin did you use for your print? Your answer will inform your average curing time. Opaque and darker prints tend to take a little longer to cure. In contrast, transparent resins let in more UV light and therefore will be ready sooner.
When choosing materials for your projects, keep their opacity in mind when it comes to curing time.
The Curing Method You’re Using
Your UV lighting setup is another factor that influences curing time. The temperature, wavelength, and position of light sources are all worth considering. Once you’ve got a few prints under your belt, you’ll grow accustomed to what works best for your build types and projects.
If you’re forgoing artificial light altogether and instead relying on sunlight, just keep in mind that this can take significantly longer than using lamps. It’s a perfectly valid way to cure your prints, but make sure you’re keeping an eye on the sun’s position and rotating your projects accordingly.
If you’re not careful, you can over-cure one half and under-cure the other!
High VS Low UV Wavelengths
As you may have already guessed, higher wavelength UV lamps help to cure projects significantly faster than lower UV wavelength options. The most common low-UV curing method is to leave the build exposed to sunlight for a period of time.
Keep in mind many windows have UV filters built into them, so you may have to do this outside instead.
In most purpose-built curing stations, you’ll be dealing with far more efficient, high-UV lamps that can get your print ready much faster. Keep in mind, however, that some lower end stations use smaller lamps or fewer light sources overall.
Be sure to shop around when looking for a new station and make sure you get one that’s well-reviewed online.
Ambient and Local Temperatures
The environment in which your print is being cured can change your overall curing time by quite a bit. The higher the temperature around your project, the shorter your curing time is likely to be.
Most curing stations include lightbulbs designed to let off enough heat to help the process along. This helps the polymer network of your prints start to crosslink and form the bonds you need for a durable, well-finished project.
Keep in mind that curing prints on a hot summer’s day will probably take less time than on a cold winter’s morning. In general, try to keep your curing environment relatively dry. Too much ambient humidity can also play a role and negatively impact your final results.
After you’ve got a few prints under your belt in a few different environments, you’ll find that you’ve developed a sense for how long things are going to take. Keeping an eye on things and rotating regularly are two sure-fire ways to success.
Related: Resin vs FDM 3D printers
How to Tell When a 3D Resin Print Has Finished Curing
Having a general idea about curing times and what can affect them is a great way to stay on top of your projects and avoid over-curing them. However, our advice is to really nail down what a finished build looks like.
This way, you won’t have to worry as much about how long it’s been. Once you’ve waited for the right ballpark amount of time, you can inspect your prints to determine whether or not they’re finished.
This can take a little practice to get right, but it’s worth it if you ask us.
Less Flexibility
The curing process turns your wobbly, flexible objects into firmer, more solid ones. Gently pick up your print and pay attention to how firm it’s become. Once it’s lost its flexibility, it’s finished!
If you’re feeling brave, you could carefully drop your print onto a flat surface. If it feels heavier and gives a more substantial ‘thud,’ this is another good sign that it’s ready.
Silky, Matte Finish
If your print still looks wet or sticky, it’s unlikely to have finished curing. Pay close attention to your project as it cures. Note the appearance of its surface before you put it under UV light. Once the exterior of your print has a silky or matte finish, it’s probably fully cured!
Scratch Marks
You should obviously be super careful when trying out this tip. When you poke or run your finger along an uncured print, you’ll leave behind small scratch marks and smudges. This is of course best avoided for projects that you need a perfect finish for.
If you’re pretty confident that your print has finished curing, you could gently prod an indiscrete part of it. No scratch marks or dents? It’s probably ready!
Can You Over-Cure 3D Resin Prints?
Yes, absolutely. It won’t happen immediately, but over-curing is definitely possible and is best avoided if you care about durability and strength for your prints. Over-curing happens most often when people leave their projects under UV light for too long.
Keep in mind that exposure to sunlight can also over-cure a print long after you’ve finished working on it. Consider where you display your projects and protect them from harsh UV rays whenever possible.
An over-cured print will be far more brittle and prone to breaking. In general, slightly under-curing your projects is preferable to over-curing them.
How to Avoid Over-Curing
Follow the best practices outlined below to avoid over-curing. The good news here is that it’s relatively easy to protect your builds from too much UV light.
Be Vigilant
Once you’ve decided to cure a print, commit to the idea that it deserves your attention. Don’t start up anything distracting until you’ve safely removed your print from your lamps or sunlight.
Regular checks and rotations will only help things along. Stay vigilant to avoid disappointment.
Check Your Temperatures and Keep Them Steady
Is your room warmer than usual? Is there a door open that could cool things down too much? Check the temperature of your curing environment and try to keep it as steady as possible. Avoid elements like steam and particulates like dust too.
Check for Manufacturer Guidance
Most 3D resins are fairly universal when it comes to curing time and printing process. That said, it’s definitely worth double-checking the packaging of your resin for specific guidance from its manufacturer.
Make a note of whether your resin is opaque or transparent as this will affect curing time too.
The Bottom Line
In general, your average print will be fully cured within a few minutes. Myriad factors can influence final curing time, but your best bet will be to become accustomed to what a finished build looks like. This way, you can work proactively instead of relying on a timer.